How To Make Honey Powder In Your Oven Step By Step
Making honey powder in your oven is simple, affordable, and incredibly useful for cooking, baking, and seasoning. This guide walks you through the entire process from preparing honey to storing your finished powder. You will learn the exact temperatures, timing, and techniques to get perfect dehydrated honey granules every time.
Have you ever wanted to turn liquid honey into a dry, powdery form that is easy to sprinkle, mix, and store? Making honey powder in oven is one of the simplest kitchen projects you can try. It takes just a few basic ingredients and a little patience. The result is a versatile ingredient that elevates your cooking and baking in amazing ways.
Whether you are looking for a natural sweetener, a dry rub base, or a substitute for granulated sugar, honey powder delivers. This guide shows you exactly how to make it step by step. No fancy equipment needed. Just your oven and some simple instructions.
By the end of this article, you will know everything about dehydrating honey at home. You will understand the right temperatures, timing, and techniques. You will also learn how to store and use your homemade honey powder creatively. Let us get started.
Key Takeaways
- Easy Process: You only need honey, parchment paper, and your oven to make honey powder at home.
- Low Temperature Is Key: Drying honey at 120°F to 140°F ensures it dehydrates properly without burning or losing nutrients.
- Versatile Ingredient: Homemade honey powder works as a sweetener, seasoning, and substitute for sugar in many recipes.
- Long Shelf Life: When stored correctly in an airtight container, your honey powder can last for months.
- No Special Equipment Needed: You do not need a food dehydrator. Your regular oven works perfectly fine.
- Customizable Texture: You can blend the dried honey to get fine powder or coarse granules based on your preference.
📑 Table of Contents
- What Is Honey Powder And Why Make It At Home?
- What You Will Need To Make Honey Powder In The Oven
- Step By Step Process To Make Honey Powder In Your Oven
- Tips For Perfect Honey Powder Every Time
- How To Store And Use Your Homemade Honey Powder
- Common Mistakes To Avoid When Making Honey Powder
- Expert Insights On Dehydrating Honey At Home
- How Long Does Homemade Honey Powder Last?
- Honey Powder Vs Store-Bought: Is Homemade Worth It?
- Conclusion
What Is Honey Powder And Why Make It At Home?
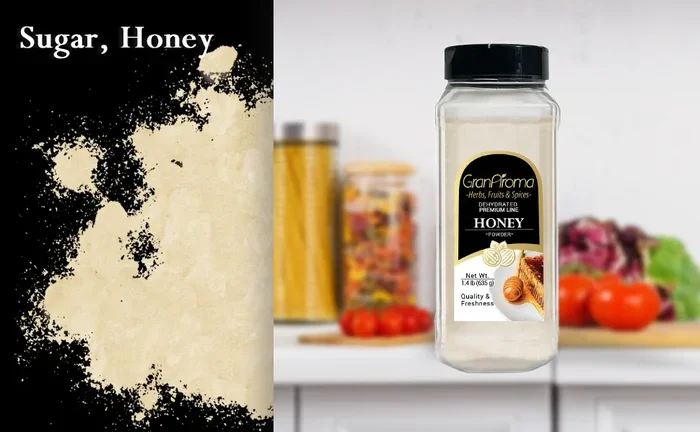
Honey powder is essentially dehydrated honey that has been dried into a fine, granulated form. It looks similar to powdered sugar or cornmeal. People often call it dry honey or honey granules. It is a shelf-stable version of liquid honey that is much easier to handle and measure.
Store-bought honey powder can be expensive. Many commercial versions also contain added fillers like corn starch or maltodextrin. When you make it yourself, you know exactly what goes into it. You get pure honey with nothing extra added.
Here are some great reasons to try making your own:
- Cost Savings: A jar of quality honey costs less than most store-bought honey powder products.
- Purity: You control the ingredients. No fillers, no additives, no preservatives.
- Custom Texture: You can make it fine like powder or coarse like granules.
- Convenience: Powdered honey is easier to measure, mix into dry blends, and sprinkle over food.
- Longer Shelf Life: Removing the moisture from honey helps it last much longer without spoiling.
- Versatility: Use it in smoothies, on yogurt, in spice rubs, and in baking recipes.
How Is Honey Powder Different From Regular Honey?
Regular honey is a thick, sticky liquid. Honey powder is the same honey after the water content has been removed through drying. This process changes its form completely. The flavor stays the same, but the texture becomes dry and free-flowing.
This difference matters a lot in the kitchen. You cannot easily sprinkle liquid honey over your morning oatmeal. But you can definitely sprinkle honey granules on top. The powder form also blends more evenly into dry mixes, batters, and rubs.
What You Will Need To Make Honey Powder In The Oven
The beauty of this project is how simple it is. You do not need any special tools or equipment. Everything you need is probably already in your kitchen right now.
Ingredients
- Raw Honey: Use good quality honey. Raw, unfiltered honey works best because it retains natural enzymes and flavor. You can also use regular commercial honey if that is what you have on hand.
Equipment
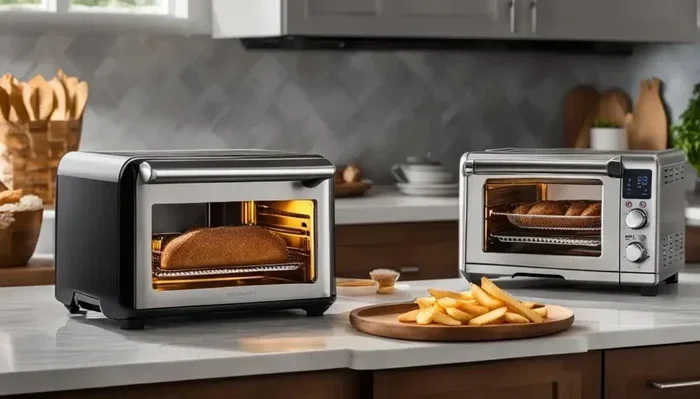
- Oven: Your standard kitchen oven works perfectly. It does not need to be anything fancy.
- Parchment Paper: This prevents the honey from sticking to your baking sheet. It makes cleanup a breeze.
- Baking Sheet or Sheet Pan: A flat, rimmed baking sheet is ideal for spreading the honey thinly.
- Spatula or Butter Knife: You need something to spread the honey evenly across the pan.
- Blender or Food Processor: Once the honey is dried and brittle, you will need to break it down into powder form.
- Airtight Container: For storing your finished honey powder properly.
Optional But Helpful Items
- Plastic Wrap: To cover the baking sheet during drying.
- Mortar and Pestle: A great alternative to a blender for small batches.
- Sifter or Fine Mesh Strainer: Helps you get an ultra-fine powder after blending.
Step By Step Process To Make Honey Powder In Your Oven
Now let us get into the actual process. Follow these steps carefully and you will have beautiful homemade honey powder in a few hours.
Step 1: Prepare Your Baking Sheet
Line a baking sheet with parchment paper. Make sure the paper fits flat without any wrinkles or folds. Wrinkles can cause the honey to pool in certain spots, which leads to uneven drying.
If you prefer, you can lightly grease the parchment paper with a tiny bit of oil. This is optional but can help with removal later. The goal is to create a smooth, flat surface for the honey to spread on.
Step 2: Spread The Honey Evenly
Pour your honey onto the prepared baking sheet. Use your spatula or butter knife to spread it as thinly and evenly as possible. The thinner you spread it, the faster and more evenly it will dry.
Think of it like spreading frosting on a cake. You want a consistent layer about 1/8 inch to 1/4 inch thick. Avoid creating thick spots because those areas will take much longer to dry. They may even stay sticky in the middle.
Pro Tip: If you want a finer powder, spread the honey thinner. For coarser granules, a slightly thicker layer works fine. I usually aim for about 1/8 inch thickness for the best results.
Step 3: Set Your Oven To The Right Temperature
This is the most important step. Set your oven to the lowest possible temperature. Most ovens can go as low as 120°F to 170°F. The ideal range for drying honey is between 120°F and 140°F.
Why so low? Because high heat will cook the honey and change its flavor and color. You want to remove moisture slowly through gentle heat. This is called low-temperature dehydration. It preserves the natural taste and beneficial properties of raw honey.
If your oven does not go below 170°F, prop the oven door open slightly with a wooden spoon. This allows moisture to escape and keeps the temperature lower inside the oven.
Step 4: Place The Baking Sheet In The Oven
Put the baking sheet on the middle rack of your oven. This ensures even heat distribution around the honey. If your oven has hot spots, you can rotate the pan halfway through the drying time.
Leave the oven door slightly cracked open if your oven tends to run hot. This small trick helps maintain a lower temperature and allows steam to escape. You want dry air circulating around the honey, not trapped moisture.
Step 5: Dry The Honey For Several Hours
This is where patience comes in. Drying honey in the oven typically takes between 4 and 8 hours. The exact time depends on several factors:
- Thickness of the honey layer: Thinner layers dry faster.
- Oven temperature: Lower temperatures take longer but produce better results.
- Humidity in your kitchen: More humid environments take longer to dry.
- Type of honey: Thicker, denser honeys like buckwheat take longer than lighter varieties like clover honey.
Check on the honey every hour or so. You are looking for it to become completely dry and brittle. When it is ready, it should crack and break easily when you press it with your finger. There should be no sticky spots or moisture remaining.
Step 6: Let It Cool Completely
Once the honey is fully dried, remove the baking sheet from the oven. Let it cool to room temperature before handling. The dried honey will be very brittle at this point. It might crack and break into pieces as it cools.
Do not try to break it up while it is still warm. Letting it cool ensures it becomes nicely crisp and easier to process into powder. This usually takes about 30 minutes to an hour.
Step 7: Break It Into Pieces And Blend
Once cooled, lift the dried honey sheet off the parchment paper. It will likely crack into large, rigid pieces. Break or chop these pieces into smaller chunks that will fit into your blender or food processor.
Place the chunks into your blender or food processor. Blend on high speed until you reach your desired texture. For a fine honey powder, blend for several minutes until it feels like flour or powdered sugar. For coarse honey granules, blend for a shorter time and stop to check the texture frequently.
Pro Tip: Stop the blender occasionally and shake the container or use a spatula to push larger pieces back down. This helps everything blend more evenly.
Step 8: Sift And Store
If you want an ultra-fine powder, pass your blended honey through a fine mesh sifter or strainer. The larger chunks that stay on top can go back into the blender for another round.
Transfer your finished honey powder into an airtight container. A glass jar with a tight-fitting lid works perfectly. Store it in a cool, dry place away from direct sunlight.
Properly stored, homemade honey powder can last for 6 to 12 months or even longer. The key is keeping moisture out. Always use a dry spoon when scooping it out.
Tips For Perfect Honey Powder Every Time
Making honey powder in oven is straightforward, but a few extra tips can help you get the best results every single time.
Choose The Right Type Of Honey
Not all honeys dry the same way. Lighter honeys like clover honey or orange blossom honey tend to dry faster and produce a lighter-colored powder. Darker honeys like buckwheat honey or manuka honey take longer to dry and result in a darker powder with a stronger flavor.
For beginners, I recommend starting with a light, mild honey. It is more forgiving and gives you a neutral powder that works well in many recipes.
Spread It As Thin As Possible
The thinner you spread the honey, the faster and more evenly it dries. Thick spots stay sticky and can develop mold if not fully dried. Use a light hand when spreading and aim for the most uniform layer you can achieve.
Do Not Rush The Process
It is tempting to crank up the heat to speed things along. Resist that urge. High heat will caramelize the sugars in the honey, changing its color and flavor dramatically. You want to remove water, not cook the honey. Patience is the secret ingredient in making great honey powder.
Check For Complete Drying
Before you blend the dried honey, make sure it is completely dry. Any remaining moisture will cause the powder to clump and shorten its shelf life. Break a piece in half. If it snaps cleanly and feels dry throughout, it is ready. If it feels tacky or flexible, it needs more time in the oven.
Blend In Batches If Needed
Do not overload your blender or food processor. Large quantities of dried honey chunks can be difficult to blend evenly. Work in smaller batches for the best, most consistent powder.
How To Store And Use Your Homemade Honey Powder
Once you have made your honey powder, proper storage is essential to keep it fresh and usable for months. Here is everything you need to know.
Best Storage Practices
- Airtight Container: Use a glass jar, sealed plastic container, or vacuum-sealed bag. Moisture is the enemy of honey powder.
- Cool, Dark Place: Store your container in a pantry or cupboard away from heat and sunlight.
- Avoid Humidity: Do not store honey powder near the stove, dishwasher, or any source of steam.
- Use A Dry Spoon: Always use a completely dry spoon or scoop to remove powder from the container. Even a tiny bit of moisture can cause clumping.
- Label And Date: Write the date on your container so you can track freshness.
Creative Ways To Use Honey Powder
Homemade honey powder opens up a world of culinary possibilities. Here are some of the best ways to use it:
- Sprinkle On Oatmeal Or Yogurt: It dissolves easily and adds natural sweetness without the mess of liquid honey.
- Make Honey Tea: Stir honey powder into hot water for a quick and convenient honey tea.
- Create Dry Rub Mixes: Combine honey powder with salt, pepper, garlic powder, and smoked paprika for a flavorful meat rub.
- Add To Smoothies: Blend honey powder into your favorite smoothie recipes for natural sweetness.
- Use In Baking: Substitute honey powder for sugar or liquid honey in cookies, cakes, and muffins.
- Season Popcorn: Mix honey powder with a little salt and cinnamon for a sweet popcorn topping.
- Make Honey Glazes: Whisk honey powder with olive oil and vinegar for a quick and easy glaze for roasted vegetables or grilled meats.
- Energy Balls: Blend honey powder with oats, peanut butter, and chocolate chips for healthy homemade energy bites.
Honey Powder As A Sugar Substitute
One of the most popular uses for honey powder is as a sugar substitute. It is sweeter than regular sugar, so you need less of it. A general rule of thumb is to use about 1/2 to 2/3 cup of honey powder for every 1 cup of sugar a recipe calls for.
Because honey powder is dry, it blends into batters and doughs much more easily than liquid honey. It does not add extra moisture to your recipes, which is a big advantage in baking.
Common Mistakes To Avoid When Making Honey Powder
Even though this process is simple, there are a few common mistakes that can ruin your results. Here is what to watch out for.
Setting The Oven Temperature Too High
This is the number one mistake people make. If your oven temperature is too high, the honey will caramelize and burn on the outside while staying wet on the inside. Always use the lowest setting your oven allows and be patient.
Spreading The Honey Too Thick
Thick layers take much longer to dry and often result in sticky centers that never fully dehydrate. Keep the layer thin and even for the best results.
Not Checking For Moisture
If you blend the honey before it is fully dry, your powder will clump and spoil quickly. Always test for complete dryness before moving to the blending stage.
Using A Non-Airtight Container For Storage
Honey powder is hygroscopic, meaning it absorbs moisture from the air. If stored in a loose container or a bag that is not sealed properly, it will absorb humidity and become lumpy. Always use a truly airtight container.
Skipping The Sifting Step
While not strictly necessary, sifting gives you a much finer and more uniform powder. Skipping this step may leave you with some larger chunks that do not dissolve as easily in drinks or batters.
Expert Insights On Dehydrating Honey At Home
Making honey powder at home is a great example of how simple food preservation techniques can transform a single ingredient into something entirely new and useful. Food preservation experts agree that low-temperature dehydration is one of the best methods for retaining the natural flavor, color, and nutritional properties of honey.
Unlike commercial production methods that may use spray drying or industrial dehydrators, the oven method gives you full control over the process. You can adjust the thickness, temperature, and drying time based on the type of honey you are using and the texture you want in the final product.
Many culinary experts also point out that honey powder is an underrated ingredient in home kitchens. It bridges the gap between liquid honey and granulated sugar, offering the best of both worlds. It is easy to measure, simple to store, and incredibly versatile across sweet and savory applications alike.
If you are new to this process, start with a small batch using a cup or two of honey. This lets you experiment with spreading thickness, drying time, and blending texture without committing to a large amount. Once you are comfortable with the process, you can scale up to make larger batches for regular use.
How Long Does Homemade Honey Powder Last?
When stored properly in an airtight container in a cool, dry place, homemade honey powder can last anywhere from 6 months to over a year. The key factors that affect shelf life are moisture content and storage conditions.
If you notice any clumping, change in color, or off smell, it is best to discard the powder and make a fresh batch. Always use clean, dry utensils when handling your honey powder to prevent introducing moisture or contaminants.
Honey Powder Vs Store-Bought: Is Homemade Worth It?
The short answer is yes. Homemade honey powder is fresher, purer, and often tastes better than most commercial options. Store-bought honey powder frequently contains anti-caking agents and fillers that dilute the honey flavor. When you make it yourself, you get 100% pure dehydrated honey with nothing added.
From a cost perspective, making honey powder at home is significantly cheaper. A pound of quality raw honey costs less than a small container of commercial honey powder, and you can make much more at home with the same amount of honey.
The only trade-off is time. The drying process takes several hours, so you need to plan ahead. But the process itself requires very little active effort. You spread the honey, set the oven, and wait. There is plenty of time to do other things while your honey dries.
Conclusion
Making honey powder in your oven is one of the most rewarding and practical kitchen skills you can develop. It is simple, affordable, and the results are incredibly versatile. From sweetening your morning coffee to creating flavorful dry rubs for barbecue, honey powder adds a touch of natural sweetness to almost everything you cook and bake.
The process is straightforward. You spread thin layers of honey on a parchment-lined baking sheet, dry it at a low temperature for several hours, and then blend it into a fine powder or coarse granules. No special equipment is needed. No complicated techniques are required. Just patience and a willingness to try something new.
I encourage you to give this a try with your next jar of honey. Once you see how easy and satisfying it is to make your own dehydrated honey powder, you will wonder why you ever bought the expensive store-bought version. It is one of those simple kitchen projects that pays off in big ways. Start with a small batch today and discover the joy of homemade honey powder.
Frequently Asked Questions
Can I use any type of honey to make honey powder?
Yes, you can use any type of honey including raw, organic, clover, or buckwheat honey. Lighter honeys tend to dry faster and produce a milder powder, while darker honeys take longer and have a stronger flavor. Experiment with different types to find your favorite.
Do I need a food dehydrator to make honey powder?
No, you do not need a food dehydrator at all. Your regular home oven works perfectly well for making honey powder. The key is to set the temperature low, between 120°F and 140°F, and allow enough time for the honey to dry completely.
How long does it take to make honey powder in the oven?
The drying process typically takes between 4 and 8 hours depending on the thickness of your honey layer, your oven temperature, and the type of honey you are using. Thinner layers and lighter honeys dry faster, while thick layers and dark honeys take longer.
Can I add anything to my honey powder to prevent clumping?
Some people add a small amount of corn starch or tapioca starch to their honey powder to prevent clumping. However, if you want pure honey powder with no additives, simply make sure it is completely dry before blending and store it in a sealed airtight container.
Is honey powder the same as powdered sugar?
No, honey powder and powdered sugar are completely different. Honey powder is dehydrated honey, while powdered sugar is finely ground granulated sugar with a small amount of corn starch added. Honey powder is a natural sweetener with a distinct honey flavor and nutritional profile.
Can I use honey powder in place of liquid honey in recipes?
Yes, you can substitute honey powder for liquid honey in many recipes. Since honey powder is dry, you may need to adjust the liquid content in your recipe slightly. A good starting point is to use about 1/3 cup of honey powder for every 1/4 cup of liquid honey, and reduce other liquids in the recipe by a small amount.