How To Clean A GE Self Cleaning Oven Quickly And Easily
Learning how to clean a GE self cleaning oven quickly and easily saves you time and effort every week. This guide walks you through the full self cleaning cycle, manual cleaning tips, and everyday maintenance to keep your oven spotless. You will discover simple tricks to remove grease, eliminate odors, and prevent buildup before it starts. Whether you own a newer GE model or an older unit, these methods work reliably. By the end, you will feel confident tackling any oven mess with ease.
Your oven works hard for you. It bakes your favorite meals, roasts Sunday dinners, and warms up leftovers on busy weeknights. But let us be honest, all that cooking leaves a mess. Grease splatters, food spills, and smoke stains build up fast inside your oven. If you own a GE self cleaning oven, you already have a powerful tool to handle the dirty work. The question is, do you know how to use it properly?
This guide will show you exactly how to clean a GE self cleaning oven quickly and easily. We will cover every step, from preparing your oven to running the cleaning cycle and maintaining results afterward. You will learn practical tips that save time, reduce smoke, and keep your oven working at its best. No guesswork, no harsh chemicals, just straightforward advice that really works.
Whether you are dealing with last week’s pizza spill or months of baked-on grease, this article has you covered. Let us get started and make your oven sparkle again.
Key Takeaways
- Use the self cleaning cycle correctly: Run it at high heat to burn off food residue and grease buildup safely.
- Prepare your oven beforehand: Remove racks and wipe large debris to get the best results from the cleaning cycle.
- Ventilate your kitchen: Open windows and turn on the range hood to reduce smoke and odors during the cleaning process.
- Clean oven racks separately: Soak them in warm soapy water or use a baking soda paste for tough stains.
- Maintain your oven regularly: Wipe spills immediately and run light cleaning cycles to prevent heavy buildup.
- Avoid harsh chemicals: Stick to gentle, oven-safe cleaners to protect the enamel interior and self cleaning feature.
- Know when to call a pro: Persistent odors or error codes after cleaning may signal a deeper issue that needs professional attention.
📑 Table of Contents
- Understanding How A GE Self Cleaning Oven Works
- How To Prepare Your GE Oven For Cleaning
- Step By Step Guide To Running The Self Cleaning Cycle
- Manual Cleaning Tips For Tough Spots
- Common Mistakes To Avoid When Cleaning Your GE Oven
- Maintenance Tips To Keep Your Oven Clean Longer
- When To Call A Professional For Oven Cleaning Help
- Final Thoughts On Cleaning Your GE Self Cleaning Oven
Understanding How A GE Self Cleaning Oven Works
Before you jump into the cleaning process, it helps to understand what is happening inside your oven. GE self cleaning ovens use a method called pyrolytic cleaning. This means the oven heats itself to an extremely high temperature, usually around 900 degrees Fahrenheit. At that heat, food residue and grease turn into ash. All you have to do is wipe the ash away when the cycle finishes.
This is different from traditional ovens where you scrub and scrape. The self cleaning feature does the heavy lifting for you. However, knowing how it works helps you prepare properly and avoid common mistakes. For example, you should never use chemical cleaners during a pyrolytic cycle. The extreme heat can cause those chemicals to release toxic fumes. Stick to the oven’s built-in cleaning function for the best and safest results.
Most modern GE ovens also have a steam cleaning option. This uses lower heat and water to loosen light grime. It is great for quick touchups between full self cleaning cycles. Both methods are effective, but they serve different purposes. Understanding this difference will help you choose the right approach each time.
The Pyrolytic Cleaning Cycle Explained
The pyrolytic cycle is the most powerful cleaning option. It locks the oven door automatically during the process for safety. The cycle typically runs for two to four hours depending on how dirty the oven is. During this time, the temperature rises slowly, burns off all organic matter, and then cools down on its own.
Once the cycle ends, you will find a layer of gray ash inside the oven. This ash is completely harmless and easy to remove. A damp cloth or sponge wipes it away effortlessly. The entire interior should look clean and fresh after just one cycle. This is why so many people rely on the self cleaning feature for deep oven maintenance.
The Steam Cleaning Option
Steam cleaning is a gentler alternative. It works best for light soil and everyday grime. You add a cup of water to the oven floor, set the temperature to around 250 degrees, and let it run for about 15 to 30 minutes. The steam loosens food particles and grease, making them easy to wipe away.
Steam cleaning is perfect for routine maintenance. You can do it more frequently without worrying about the oven reaching extreme temperatures. It also produces less smoke and odor compared to the full pyrolytic cycle. For best results, use steam cleaning weekly and save the full self cleaning cycle for deeper messes.
How To Prepare Your GE Oven For Cleaning
Preparation is the most important step in the entire process. Skipping this stage can lead to poor results, excess smoke, or even damage to your oven. Taking a few minutes to prep properly will make everything smoother and faster.
Start by removing everything from inside the oven. Take out the oven racks, the temperature probe, and any baking stones or pans. These items should never go through the self cleaning cycle. The extreme heat can warp metal racks and damage stone surfaces. Set them aside for separate cleaning.
Next, check the oven floor for large food particles. Use a paper towel or a damp cloth to wipe away any loose debris. You do not need to scrub at this stage, just remove the big stuff. This prevents excessive smoke and odor when the cycle starts. Also, clear any items from around the oven vent to ensure proper airflow during the cleaning process.
Removing Oven Racks The Right Way
Oven racks can be cleaned separately, and you should always remove them before starting the self cleaning cycle. The high heat can cause racks to discolor or become misshapen over time. Instead, wash them by hand or soak them in your sink.
Fill your sink with hot water and add a squirt of dish soap. Submerge the racks and let them soak for at least 30 minutes. For stubborn grease spots, sprinkle baking soda directly on the affected areas and scrub gently with a non abrasive sponge. Rinse thoroughly and dry completely before placing them back in the oven.
Alternatively, you can place racks in a large garbage bag with a cup of ammonia. Seal the bag and let it sit overnight. The fumes will dissolve grease without scrubbing. This trick works wonders on heavily soiled racks. Just make sure you rinse them extremely well and air them out before using them again.
Step By Step Guide To Running The Self Cleaning Cycle
Now that your oven is prepped, it is time to start the cleaning cycle. Follow these steps carefully to get the best results every time.
- Close the oven door fully. Make sure nothing is obstructing the door from closing completely. The lock mechanism must engage properly for the cycle to start.
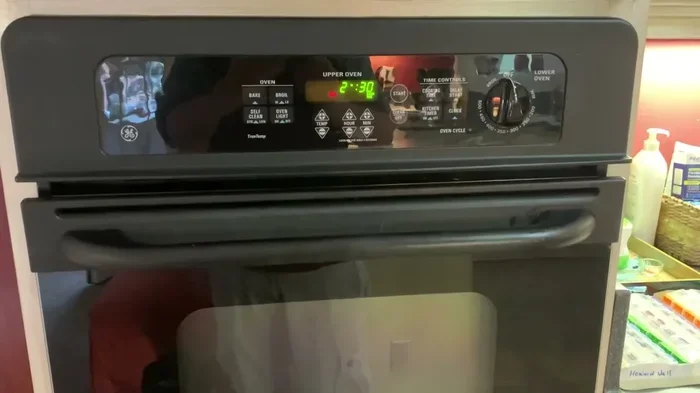
- Select the self cleaning setting. On most GE models, you will find this on the control panel. Some ovens have a dedicated button, while others require you to scroll through a menu. Refer to your owner’s manual if you are unsure.
- Set the time if needed. Some GE ovens let you choose between heavy, normal, or light soil settings. Heavier soil requires longer cycles. For moderately dirty ovens, the normal setting usually works perfectly.
- Start the cycle and walk away. The oven will heat up gradually. You will hear it fan running and may see some light smoke. This is completely normal. Do not open the door during the cycle.
- Wait for the cycle to complete. Once finished, the oven will cool down automatically. The door lock will release when the interior temperature drops to a safe level.
- Wipe out the ash. Use a damp microfiber cloth to wipe away all the ash from the oven walls, floor, and ceiling. A small vacuum with a brush attachment also works well for this step.
That is really all there is to it. The self cleaning cycle does the hard work while you take a break. Most people are surprised at how easy it is once they try it for the first time.
What To Do About Smoke And Odor
Some smoke and odor are normal during the self cleaning cycle, especially if your oven has a lot of buildup. However, excessive smoke can set off your smoke detectors and make your kitchen uncomfortable. To minimize this, run the cycle when you can open windows and turn on your range hood. If the smoke is particularly heavy, you can place a bowl of white vinegar on the oven floor before starting. The vinegar helps neutralize odors and reduce smoke slightly.
Another helpful tip is to clean up any large spills before running the cycle. The more food residue you remove manually, the less smoke the self cleaning cycle will produce. Think of it as a partnership between you and your oven, working together for the best outcome.
Manual Cleaning Tips For Tough Spots
Sometimes the self cleaning cycle does not remove everything on its own. Stubborn stains, baked on grease, or discolored areas may need a little extra attention. This is where manual cleaning comes in handy. The good news is that you do not need expensive commercial oven cleaners to get great results.
The Baking Soda And Vinegar Method
This is one of the most effective and natural cleaning methods for ovens. Start by making a paste from baking soda and water. Mix about half a cup of baking soda with just enough water to form a spreadable consistency. Spread the paste evenly across the inside of the oven, avoiding the heating elements. Let it sit for at least 12 hours or overnight.
The next day, spray or drizzle white vinegar over the paste. It will start to fizz, which helps lift dirt and grease. Use a damp cloth to wipe everything away. The baking soda acts as a gentle abrasive, while the vinegar breaks down grease and deodorizes the surface. This method works beautifully on the oven floor and walls without any harsh chemicals.
Dealing With Grease Buildup On The Oven Door
The oven door is one of the most overlooked areas during cleaning. Grease and grime build up on the glass, making it hard to see your food while it cooks. To clean the door, mix a few drops of dish soap with warm water. Dip a soft cloth into the solution and wipe the glass thoroughly. For baked on spots, make a paste of baking soda and water, apply it to the glass, and let it sit for 20 minutes before wiping clean.
For the inside of the oven door glass, use the same baking soda and vinegar method described above. The glass can trap grease over time, so pay extra attention to the corners and edges. A razor scraper designed for glass cooktops can also help remove really stubborn spots, but use it gently to avoid scratching the surface.
Cleaning The Oven Vent And Exterior
Do not forget about the oven vent and exterior surfaces. Grease can accumulate around the vent and affect airflow, which impacts how your oven performs. Use a damp cloth with mild dish soap to wipe down the vent area and the outside of the oven door. For stainless steel exteriors, use a dedicated stainless steel cleaner to avoid streaks and maintain the finish.
Wipe up any grease splatters on the control panel with a lightly dampened cloth. Never spray liquid directly onto the panel, as moisture can seep inside and damage the electronics. A little prevention goes a long way in keeping your oven looking and functioning its best.
Common Mistakes To Avoid When Cleaning Your GE Oven
Even with the best intentions, people make mistakes when cleaning their ovens. Avoiding these common errors will protect your oven and help you get better results.
- Using chemical oven cleaners during the self cleaning cycle. This is extremely dangerous. The chemicals can produce toxic fumes at high temperatures and damage the oven’s interior coating.
- Leaving oven racks inside during the pyrolytic cycle. The intense heat can warp or discolor metal racks permanently. Always remove them beforehand.
- Opening the door during the cycle. The oven locks automatically for a reason. Opening it releases heat and can interrupt the cleaning process, potentially causing damage.
- Scrubbing the interior with abrasive pads. After a self cleaning cycle, the ash wipes away easily with a damp cloth. Abrasive scrubbers can scratch the enamel and damage the surface.
- Ignoring regular maintenance. Waiting too long between cleanings allows grease and food residue to build up, making the self cleaning cycle less effective and producing more smoke.
- Forgetting to clean the oven door seal. The rubber seal around the door traps grease and food particles. Wipe it down regularly with a damp cloth to maintain a proper seal and efficient cooking.
By steering clear of these mistakes, you will protect your investment and keep your oven running smoothly for years to come.
Maintenance Tips To Keep Your Oven Clean Longer
The best way to make oven cleaning easier is to prevent buildup in the first place. A few simple habits can save you significant time and effort over the long run.
- Use oven-safe lids or foil covers when cooking messy foods. This catches spills before they reach the oven floor and burn onto the surface.
- Wipe up spills immediately. If you notice a spill while cooking, let the oven cool slightly and wipe it out with a damp cloth. Fresh spills are much easier to remove than baked on ones.
- Run a light steam cleaning weekly. A quick 15 minute steam cycle keeps light grime from building up and makes deep cleaning cycles less frequent.
- Place a baking sheet under dishes that tend to bubble over. This simple trick catches overflow and protects the oven floor from stains.
- Check and clean the oven vent monthly. Clear airflow prevents smoke buildup and helps the oven heat more evenly.
- Replace oven racks if they become warped or heavily discolored. Damaged racks can interfere with even heat distribution and are harder to clean thoroughly.
Consistency is the key to a clean oven. Spending just a few minutes on maintenance after each use pays off enormously when it is time for a deeper clean. Your future self will thank you every time you open that sparkling oven door.
When To Call A Professional For Oven Cleaning Help
Most oven cleaning tasks are perfectly manageable at home. However, there are situations where professional help makes sense. If your oven produces heavy smoke even after a thorough cleaning, there may be an issue with the heating elements or the self cleaning mechanism. Unusual odors that linger after the cycle could indicate a problem with insulation or internal components.
Error codes on your GE oven display after a cleaning cycle also warrant professional attention. These codes can signal sensor malfunctions or electrical issues that go beyond simple cleaning. A certified GE technician can diagnose and fix these problems safely and efficiently.
Additionally, if you are dealing with a heavily soiled oven that has not been cleaned in years, a professional deep cleaning service might be worth considering. They have specialized tools and industrial strength products that can restore even the worst ovens to like new condition. This is especially true for older models where the self cleaning feature may not perform as well as newer versions.
Remember, your safety always comes first. If you are ever unsure about a cleaning method or notice something unusual about your oven, it is better to seek professional advice than to risk damaging the appliance or harming yourself.
Final Thoughts On Cleaning Your GE Self Cleaning Oven
Cleaning your GE self cleaning oven does not have to be a dreaded chore. With the right approach, it becomes a quick and straightforward part of kitchen maintenance. The self cleaning cycle handles the toughest jobs, while simple manual methods take care of everyday upkeep. By preparing properly, avoiding common mistakes, and staying on top of regular maintenance, you can keep your oven in excellent condition for years.
The most important takeaway is this, a little prevention goes a long way. Wipe spills promptly, use oven-safe covers when needed, and run light cleaning cycles regularly. These small habits make deep cleaning cycles faster and more effective. Your oven works hard for you, and with the care tips in this guide, it will keep working hard for many meals to come.
Now that you know exactly how to clean a GE self cleaning oven quickly and easily, you have everything you need to get started. Try these methods, find what works best for your routine, and enjoy the satisfaction of cooking in a clean, fresh oven every single time.
Frequently Asked Questions
How long does a GE self cleaning cycle take?
A typical self cleaning cycle on a GE oven takes between two and four hours. The exact time depends on the soil level you select and how dirty the oven is. Heavy soil settings run longer, while normal or light settings complete faster. Always let the oven cool completely before opening the door after the cycle finishes.
Can I use oven cleaner on a GE self cleaning oven?
No, you should never use chemical oven cleaners on a GE self cleaning oven. The pyrolytic cleaning process uses extreme heat, and chemical cleaners can release toxic fumes at those temperatures. These fumes can damage the oven’s interior coating and pose serious health risks. Stick to the self cleaning cycle and natural cleaning methods like baking soda and vinegar.
Why does my oven smoke during the self cleaning cycle?
Some smoke is completely normal during the self cleaning cycle, especially if there is heavy grease or food buildup inside. The oven heats to around 900 degrees Fahrenheit, which burns off organic matter and produces smoke as a byproduct. To reduce smoke, clean up large spills manually before starting the cycle and make sure your kitchen is well ventilated with open windows and a running range hood.
How often should I run the self cleaning cycle?
Most households benefit from running the self cleaning cycle every three to six months. If you cook frequently or prepare greasy foods, you may need to run it more often. For everyday maintenance, a weekly steam cleaning cycle keeps the oven fresh between deep cleanings. Regular use of the self cleaning feature actually helps protect the oven interior and maintain performance over time.
Is it safe to leave the house while the self cleaning cycle runs?
It is generally safe to leave the house during the self cleaning cycle, but it is not recommended for extended periods. The cycle produces smoke and odors, and you should ensure your smoke detectors are working. Most experts suggest staying nearby during the first cycle to monitor for any unusual behavior. Once you are comfortable with how your specific GE model performs, you can feel confident stepping away briefly.
What should I do if the self cleaning cycle does not remove all the stains?
If stubborn stains remain after the self cleaning cycle, try the baking soda and vinegar method for manual cleaning. Make a paste of baking soda and water, apply it to the affected areas, and let it sit overnight. Wipe it away with a damp cloth the next day. For persistent spots, you can repeat the process or run a second self cleaning cycle on the normal or heavy soil setting. Avoid using abrasive scrubbers, as they can damage the oven’s enamel interior.
=== CONCLUSION ===
Keeping your GE self cleaning oven in top shape is easier than you might think. The self cleaning cycle does the heavy lifting, and a few simple manual cleaning habits keep everything looking great between deep cleans. You now have all the tools and knowledge to tackle oven messes quickly and confidently. From preparing your oven properly to running the cleaning cycle and maintaining results, every step matters. Start applying these tips today, and you will enjoy a cleaner, fresher oven every time you cook. Your efforts will pay off with better cooking performance, fewer odors, and an oven that lasts for years to come.