How To Use Oven Cleaner Spray And Get Great Results
Using oven cleaner spray is the easiest way to tackle tough grease and baked-on food inside your oven. This guide walks you through every step, from preparation to post-cleaning care, so you get professional-level results at home. You will learn the safest application methods, natural alternatives, and common mistakes to avoid.
Your oven works hard for you every day. It bakes your favorite meals, roasts Sunday dinner, and crisps up leftovers perfectly. But over time, grease splatters and burnt food residue build up inside. That greasy mess can affect how your food tastes and even how well your oven heats.
This is where oven cleaner spray comes in. A good cleaning spray breaks down tough stains quickly and makes the job much easier. But using it the right way matters a lot. Spray it wrong, and you might leave behind harmful residue or damage your oven surfaces.
In this guide, you will learn exactly how to use oven cleaner spray safely and effectively. We will cover every step from start to finish. You will also discover natural alternatives, common mistakes, and tips that save time and effort. By the end, your oven will look and smell like new.
Key Takeaways
- Always ventilate your kitchen before spraying any oven cleaner to stay safe and comfortable.
- Remove oven racks and trays first so you can clean every surface evenly and thoroughly.
- Let the spray sit for 15-30 minutes to break down stubborn grease and food residue effectively.
- Wipe with warm soapy water afterward to remove all chemical residue and leave your oven fresh.
- Use natural alternatives like baking soda if you prefer a non-toxic cleaning approach.
- Clean your oven every 3-4 months to prevent buildup and maintain peak performance.
- Wear protective gloves and avoid touching your face during the cleaning process.
📑 Table of Contents
- Why Oven Cleaner Spray Is So Effective
- Step-by-Step Guide To Using Oven Cleaner Spray
- Natural Alternatives To Chemical Oven Cleaner Spray
- Common Mistakes To Avoid When Cleaning Your Oven
- How Often Should You Clean Your Oven
- Expert Tips For Best Results With Oven Cleaner Spray
- Comparison: Chemical Oven Cleaner Spray vs Natural Methods
- How To Maintain A Clean Oven After Cleaning
- When To Call A Professional For Oven Cleaning
- Frequently Asked Questions
- Conclusion
Why Oven Cleaner Spray Is So Effective
Oven cleaner spray is designed to dissolve tough grease and carbonized food. Unlike scrubbing with just soap and water, these sprays use powerful formulas that target baked-on stains. The aerosol format spreads the product evenly across the oven interior.
Most oven cleaning sprays contain alkaline compounds. These chemicals break down fatty acids in grease. This makes it easy to wipe away even the oldest, hardest stains. The spray also reaches corners and crevices that are hard to access by hand.
Using a dedicated oven cleaning spray saves you hours of scrubbing. It also reduces the need for harsh elbow grease. Whether you have a standard oven or a self-cleaning model, a spray cleaner fits the job perfectly.
How Oven Cleaner Spray Works On Different Surfaces
The effectiveness of your spray depends on the surface type. Porcelain interiors respond well to most commercial sprays. Stainless steel ovens need a gentler approach to avoid scratching. Glass surfaces can develop a cloudy film if the wrong product is used.
Always check the label before spraying. Look for products that are safe for your specific oven type. Some sprays work on all surfaces, while others are formulated for specific materials. Using the right product ensures the best results without any damage.
Step-by-Step Guide To Using Oven Cleaner Spray
Follow these steps carefully for the best cleaning results. Each step plays an important role in getting a truly clean oven.
Step 1: Remove The Oven Racks And Trays
Before you do anything else, pull out all removable parts. Take out the oven racks, baking trays, and any other inserts. These pieces need separate cleaning, and removing them gives you full access to the oven interior.
Soak the racks and trays in warm soapy water while you clean the oven. This softens the grease and makes scrubbing much easier later. Use a dish basin or your bathtub for larger items.
Step 2: Ventilate Your Kitchen
Open all windows and turn on your range hood. Oven cleaner sprays contain strong chemicals that release fumes. Proper ventilation keeps you safe and comfortable during the process.
If you have sensitive lungs or allergies, consider wearing a dust mask. Keeping the kitchen well-ventilated also helps the spray dry faster and more evenly.
Step 3: Protect Your Hands And Surroundings
Put on a pair of protective rubber gloves. The chemicals in oven spray can irritate your skin. Long sleeves offer extra protection if you have sensitive skin.
Lay down old towels or newspaper around the oven base. This catches any drips or overspray. Protecting your kitchen floor saves you extra cleanup later.
Step 4: Shake The Spray Bottle Well
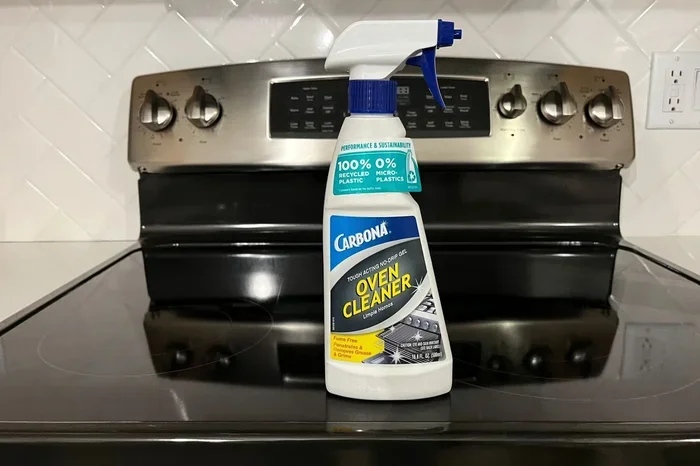
Give the oven cleaner spray bottle a good shake before use. This mixes the active ingredients evenly. A well-shaken bottle delivers a consistent spray pattern and better cleaning power.
Hold the bottle about six to eight inches from the oven interior. Start spraying from the top and work your way down. This prevents drips from landing on already-cleaned areas.
Step 5: Spray Evenly Across All Surfaces
Cover every inch of the oven interior with the spray. Pay special attention to areas with heavy grease buildup. The corners, back wall, and floor of the oven tend to collect the most residue.
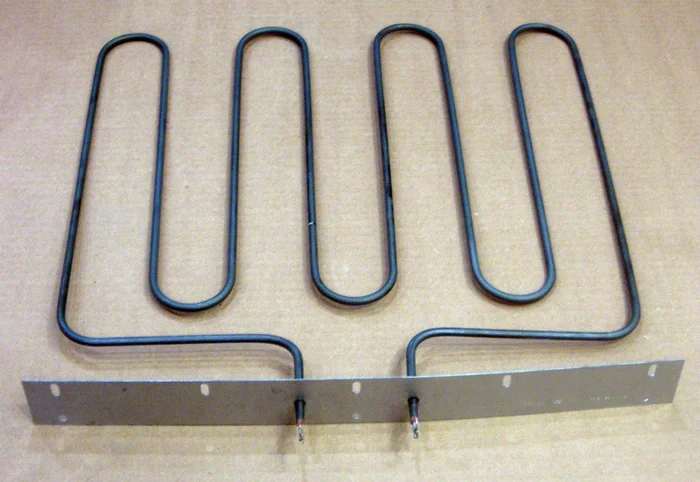
Do not spray the heating elements directly. This can damage them and reduce your oven’s efficiency. If the spray hits the elements by accident, wipe it off immediately.
Step 6: Let The Spray Sit
This is the most important step. Let the oven cleaner spray sit for at least fifteen to thirty minutes. The chemicals need time to break down the grease and baked-on food.
For really tough stains, you can let it sit for up to an hour. Check the product instructions for the recommended dwell time. Longer sitting times work better on older, stubborn grime.
Step 7: Wipe Away The Loosened Grease
Put on your gloves again and grab a clean, damp cloth. Start wiping from the top of the oven and work downward. The dissolved grease and food particles will come off easily.
Use a soft sponge or microfiber cloth for best results. Avoid abrasive scrubbers that can scratch the oven surface. Rinse your cloth frequently and wring it out as needed.
Step 8: Rinse Thoroughly And Dry
Dampen a fresh cloth with clean warm water and wipe the entire interior again. This removes any remaining cleaning solution and dissolved grime. Repeat this rinsing step two or three times.
Once the interior is clean, dry it with a separate towel. Leaving moisture inside can cause rust or unpleasant odors. Your oven is now ready for use.
Natural Alternatives To Chemical Oven Cleaner Spray
Not everyone wants to use chemical-based products. Fortunately, there are effective natural alternatives that work well for regular oven maintenance.
Baking Soda And Water Paste
Mix three parts baking soda with one part water to create a thick paste. Spread this paste all over the oven interior, avoiding the heating elements. Let it sit overnight for maximum effectiveness.
The next morning, wipe away the paste with a damp cloth. The baking soda absorbs grease and neutralizes odors naturally. For extra cleaning power, add a splash of white vinegar to the damp cloth. The fizzing reaction helps lift remaining grime.
White Vinegar And Water Solution
Mix equal parts white vinegar and water in a spray bottle. Spray the solution inside the oven and let it sit for twenty minutes. The acidity in the vinegar helps dissolve light grease and food residue.
This method works best for routine cleaning rather than heavy buildup. It is gentle enough to use frequently and leaves no harmful residue. Many homeowners keep this solution on hand for quick weekly touch-ups.
Lemon And Steam Method
Cut two lemons in half and squeeze the juice into a baking dish filled with water. Place the dish on the bottom oven rack and set the oven to 200 degrees Fahrenheit.
Let the oven run for thirty minutes. The steam loosens grease and the lemon leaves a fresh scent. After the cycle, simply wipe the interior with a damp cloth. This method is perfect for light cleaning and deodorizing.
Common Mistakes To Avoid When Cleaning Your Oven
Even with the best oven cleaner spray, mistakes can happen. Avoiding these common errors ensures better results and keeps your oven in great condition.
Skipping The Ventilation Step
Many people rush through the process and skip opening windows. This is a serious mistake. The fumes from oven cleaner spray can cause headaches, dizziness, and breathing discomfort. Always ventilate your kitchen before you start.
Using Too Much Spray
More spray does not mean better cleaning. Using too much product creates excess residue that is hard to rinse away. A light, even coating is all you need for most cleaning jobs.
Spray in short bursts and cover the surfaces evenly. You can always add another pass if a particularly stubborn stain needs more attention.
Forgetting To Rinse
One of the most common mistakes is not rinsing the oven after cleaning. Leaving chemical residue inside can affect the taste of your food. It can also create unpleasant odors when you heat the oven next time.
Always rinse thoroughly with clean water and dry the interior completely. This step takes only a few extra minutes but makes a big difference.
Spraying On A Hot Oven
Never apply oven cleaner spray to a hot oven. The heat causes the chemicals to react too quickly and can produce dangerous fumes. Always wait for the oven to cool completely before cleaning.
Plan your cleaning session after the oven has been off for several hours. This ensures both safety and better cleaning results.
How Often Should You Clean Your Oven
Regular cleaning keeps your oven performing at its best. Most home cooks benefit from a deep clean every three to four months. However, how often you clean depends on how much you use your oven.
If you bake or roast frequently, you might need to clean more often. Weekly wipe-downs of the oven floor help prevent heavy buildup. These quick sessions take just five minutes and save you from tough cleaning jobs later.
Pay attention to signs that your oven needs cleaning. Unusual odors during cooking, visible grease streaks, or smoke from food splatter are all indicators. Addressing these signs early keeps your oven running efficiently.
Quick Maintenance Tips Between Deep Cleans
- Place a baking sheet on the bottom rack when roasting to catch drips.
- Wipe up spills immediately after the oven cools down.
- Use oven-safe liners to protect the floor of your oven.
- Run a lemon steam cleaning once a month for light maintenance.
- Keep a damp cloth nearby for quick wipe-downs after cooking.
Expert Tips For Best Results With Oven Cleaner Spray
Professional cleaners share a few tricks that make oven cleaning faster and more effective. These tips come from years of experience and real-world testing.
Start with a cold oven. Always make sure your oven is completely cool before you begin. Spraying a warm or hot oven creates steam that can reduce the effectiveness of the cleaner.
Use a flashlight to inspect the interior. Shine a light around all surfaces to spot hidden grease spots and food residue. This ensures you do not miss any areas during cleaning.
Let the spray work overnight for tough jobs. For really baked-on grime, apply the cleaner and leave it overnight. Cover the oven with plastic wrap to prevent the spray from drying out too quickly.
Clean your oven racks separately. Soak them in the bathtub with hot water and a cup of dish soap. Adding a tablespoon of baking soda boosts the cleaning power. Scrub with a non-abrasive pad and rinse well.
Reapply the spray to stubborn spots. Some stains need a second application. Do not be afraid to spray again on areas that still look dirty after the first wipe-down.
Finish with a vinegar wipe. After rinsing and drying, spray a light mist of white vinegar inside the oven. Wipe it down with a clean cloth. This neutralizes any remaining chemical smell and adds a fresh scent.
Comparison: Chemical Oven Cleaner Spray vs Natural Methods
Both chemical sprays and natural methods have their place in oven cleaning. Here is a quick comparison to help you decide which approach works best for you.
| Factor | Chemical Oven Cleaner Spray | Natural Methods |
|---|---|---|
| Cleaning Power | Excellent for heavy grease and burnt-on stains | Best for light to moderate buildup |
| Ease Of Use | Simple spray and wipe process | Requires more preparation and soaking time |
| Safety | Strong fumes require ventilation and gloves | Non-toxic and safe for households with children and pets |
| Time Required | 15-30 minutes of sitting time plus wiping | Several hours or overnight for best results |
| Odor | Chemical smell that requires airing out | Fresh, pleasant scents like lemon and vinegar |
| Cost | Moderate cost per can | Very affordable using household items |
| Environmental Impact | Contains chemicals that require careful disposal | Eco-friendly and biodegradable |
For deep, heavy-duty cleaning, a chemical oven cleaner spray is hard to beat. For regular maintenance and light cleaning, natural methods work wonderfully. Many homeowners use both approaches depending on the situation.
How To Maintain A Clean Oven After Cleaning
Once you have cleaned your oven with oven cleaner spray, keeping it clean becomes much easier. A few simple habits go a long way in preventing future buildup.
Line the bottom of your oven with foil or a silicone mat. This catches drips and spills before they can bake onto the surface. Just make sure the foil does not touch the heating elements.
Clean spills immediately. When food bubbles over, wait for the oven to cool and wipe it up right away. This prevents stains from becoming permanent.
Run a self-cleaning cycle if your oven has one. Many modern ovens include a self-cleaning feature that uses high heat to burn off residue. Use this once or twice a year for low-maintenance upkeep.
Keep your oven ventilated during cooking. Opening a window or turning on the range hood reduces smoke and grease particles that settle inside the oven.
These small habits make a huge difference over time. Your oven stays cleaner for longer, and each deep cleaning session becomes faster and easier.
When To Call A Professional For Oven Cleaning
Sometimes, despite your best efforts, the oven needs professional attention. If you have not cleaned your oven in over a year, the buildup may be too severe for DIY methods.
Professional oven cleaners have access to industrial-grade products and specialized equipment. They can handle even the most heavily soiled ovens efficiently. Consider hiring a professional if you notice any of the following signs.
- Persistent smoke or burning smells during cooking.
- Visible thick layers of black grease on the oven walls.
- Your oven is not heating evenly due to residue buildup.
- You have tried multiple cleaning methods without success.
Professional cleaning services typically cost between $100 and $200 depending on the oven size and condition. This investment can extend the life of your oven significantly.
Frequently Asked Questions
Can I Use Oven Cleaner Spray In A Self-Cleaning Oven?
Most manufacturers advise against using chemical oven cleaner spray in a self-cleaning oven. The high heat of the self-cleaning cycle can cause the chemicals to react and produce harmful fumes. Stick to the self-cleaning feature or use only natural methods like baking soda paste for these ovens.
Is Oven Cleaner Spray Safe To Use Around Food?
When used correctly and rinsed thoroughly, oven cleaner spray is safe. Always remove all food items from the oven before cleaning. After spraying, rinse the interior multiple times with clean water to remove any chemical traces. Dry the oven completely before using it again for cooking.
How Long Should I Let The Oven Cleaner Spray Sit Before Wiping?
Fifteen to thirty minutes is the standard recommended time. For really tough, baked-on stains, letting the spray sit for up to an hour works better. Check the product label for specific instructions, as dwell times vary by brand and formulation.
Can I Use Oven Cleaner Spray On The Oven Door Glass?
Yes, most oven cleaner sprays are safe to use on oven door glass. Spray it on the glass surface and let it sit for fifteen minutes. Wipe it off with a damp cloth. For stubborn spots on the glass, make a paste of baking soda and water and apply it after the spray treatment.
What Should I Do If I Accidentally Spray The Heating Elements?
If the spray hits the heating elements, wipe it off immediately with a damp cloth. Do not turn the oven on while the cleaner is on the elements. The chemicals can damage the heating elements and create harmful fumes. Rinse the area thoroughly with water.
Are There Any Oven Cleaner Sprays That Are Pet And Child Safe?
Yes, several brands offer non-toxic, plant-based oven cleaner sprays. Look for products labeled as biodegradable, free of harsh chemicals, and safe for households with pets and children. Always read the label carefully and follow the manufacturer’s safety instructions before use.
Conclusion
Using oven cleaner spray is one of the simplest and most effective ways to keep your oven in top shape. With the right technique and a little patience, you can remove even the toughest grease and food residue. Remember to ventilate your kitchen, wear gloves, and always rinse thoroughly after cleaning.
Whether you choose a chemical spray or a natural alternative, consistency is key. Regular cleaning prevents heavy buildup and keeps your oven running efficiently. The tips and steps in this guide give you everything you need for excellent results every time.
Now that you know exactly how to use oven cleaner spray effectively, it is time to put the advice into action. Grab your supplies, follow the steps, and enjoy the satisfaction of a sparkling clean oven. Your kitchen will smell fresh, and your next meal will taste even better.