Can You Dehydrate Food In A Toaster Oven For Beginners
Yes, you can dehydrate food in a toaster oven. A toaster oven uses low, steady heat to remove moisture, creating crispy dried fruits, vegetables, and jerky. This guide shows you the simple steps, best foods, and common mistakes to avoid for successful home dehydration.
Can You Dehydrate Food In A Toaster Oven? The short answer is a clear yes. You can turn your everyday toaster oven into a powerful food dehydrator. It’s one of the easiest ways to start making your own dried snacks at home. No special equipment is needed. Just a toaster oven, some fresh produce, and a little patience.
Dehydrating food removes moisture, which stops bacteria and mold from growing. This makes your snacks last much longer. Dried fruits, crispy kale chips, and beef jerky all become shelf-stable treats. You save money and control what goes into your food. Toaster oven dehydration is simple, energy efficient, and perfect for beginners.
In this guide, we walk you through everything. You’ll learn how to set up your oven, which foods work best, and the exact steps to get perfect results. We also share quick tips and common mistakes to avoid. By the end, you’ll feel confident drying your own dehydrated snacks in your toaster oven.
Key Takeaways
- Toaster ovens work for dehydration: They provide gentle, even heat that mimics a dehydrator.
- Low temperature is key: Keep your oven between 125°F and 145°F for safe drying.
- Thin slices dry fastest: Uniform thickness ensures even moisture removal.
- Use the convection setting: It circulates air for better airflow and crispier results.
- Many foods dehydrate well: Fruits, vegetables, herbs, and jerky all turn out great.
- Avoid common pitfalls: Overcrowding the tray and skipping pre-treatment lead to uneven drying.
📑 Table of Contents
Can You Dehydrate Food In A Toaster Oven? The Beginner’s Guide
Using a toaster oven for dehydration is straightforward. The key is low heat and good airflow. Most toaster ovens have a convection feature that helps. This setting moves warm air around the food, drying it evenly. Without convection, you can still dry food, but it takes a bit more care.
Think of a toaster oven as a mini dehydrator. It heats up slowly and keeps a steady temperature. That’s exactly what food dehydration needs. You don’t want high heat that cooks the food. You want gentle warmth that pulls out water. This method works for many types of produce and meats.
Why Dehydrate Food at Home?
Home drying lets you make healthy snacks without added sugar or preservatives. You can use ripe bananas that are about to go bad. Turn excess garden tomatoes into tasty chips. Dry herbs from your windowsill for cooking all year round. Food preservation through dehydration is a smart way to reduce waste.
Dried foods are lightweight and portable. They make great trail mix ingredients or lunchbox additions. Kids love crispy dehydrated vegetables as a crunchy snack. Homemade jerky is often cheaper and tastier than store-bought. With oven drying, you can create a pantry full of shelf-stable snacks anytime.
How a Toaster Oven Mimics a Dehydrator
A dedicated food dehydrator has fans and trays for constant air flow. A toaster oven does the same thing, just on a smaller scale. The heating element sits at the top or back. Warm air rises and moves around the food. When you use the convection setting, a fan pushes that warm air evenly. This creates the same low heat dehydration environment as a dehydrator.
The main difference is size. A toaster oven holds less food, so you may need to dry in batches. But for a family of four, it’s usually plenty. You also save counter space and energy. Running a toaster oven for a few hours uses less electricity than a full-size oven or a large dehydrator. This makes energy efficient dehydration a real benefit.
Setting Up Your Toaster Oven for Dehydration
Before you start, you need to prep your toaster oven. The right setup makes a big difference in your results. Take a few minutes to get everything ready. This ensures your oven drying goes smoothly.
Choosing the Right Settings
Set your toaster oven to its lowest temperature. Most ovens go down to 120°F or 125°F. If yours doesn’t go that low, use the warm or toast setting on the lowest level. You want the heat gentle enough to dry, not cook. For dehydration temperature, aim for 125°F to 145°F. This range safely removes moisture without ruining nutrients.
Always use the convection setting if your oven has it. Convection means a fan blows air over the food. This creates even drying food on all sides. Without convection, you’ll need to rotate trays or flip food halfway through. The fan makes the process faster and more consistent. Check your oven manual to see how to activate convection.
Preparing Your Food for Dehydration
Wash all fruits and vegetables thoroughly. Pat them dry with a clean towel. Use a sharp knife or mandoline slicer to cut uniform pieces. Thin slices dry much faster than thick ones. Aim for about 1/8 inch thick for most fruits and veggies. For jerky, slice meat against the grain as thin as possible.
Some foods need a quick pre-treatment. This helps with color, flavor, and safety. For apples and pears, dip slices in lemon juice to prevent browning. Blanch vegetables like broccoli or carrots for 2–3 minutes in boiling water, then plunge them into ice water. This stops enzyme action that can affect texture. Pat everything dry again before placing it on the tray. Moisture removal starts with surface dryness.
Best Foods to Dehydrate in a Toaster Oven
So many foods work well for snack dehydration. You can dry fruits, vegetables, herbs, and even meats. Here are the best options for beginners. Each one is simple and rewarding.
Fruits and Vegetables
Fruits are the most popular choice for home drying. Dehydrated fruits like apples, bananas, and strawberries make sweet, chewy snacks. Banana chips turn out crispy and delicious. Apple chips are a healthy alternative to potato chips. Dehydrated apples are a family favorite. You can also make fruit leather by blending purees and spreading them thin on a parchment-lined tray.
Vegetables dry great too. Crispy dehydrated vegetables include kale chips, tomato chips, and carrot crisps. Kale chips are incredibly easy. Just toss leaves with a little olive oil and salt. Dry them until they’re crisp. Crispy kale chips are a hit with kids and adults. Tomatoes become sweet, chewy sun-dried tomatoes you can use in pasta or salads.
Jerky and Meat Snacks
Making jerky in a toaster oven is simple and cost-effective. Use lean beef, turkey, or chicken. Slice the meat very thin, about 1/8 inch. Marinate it in your favorite sauce for a few hours. Then lay the strips on a lined tray. Dry at 155°F to 160°F until the meat is firm and snaps when bent. This jerky in toaster oven method gives you control over ingredients and spice levels.
Always cook meat to a safe internal temperature before drying. This kills harmful bacteria. You can microwave the marinated strips for a minute or two before placing them in the oven. This step adds an extra layer of safety for home drying meats.
Herbs and Other Items
Drying herbs is one of the fastest dehydration tasks. Basil, oregano, thyme, and rosemary all dry beautifully. Lay whole leaves on a tray lined with parchment paper. They’ll be ready in 1–2 hours. Dehydrated herbs keep their flavor for months. Crush them into jars and use them in cooking all winter long.
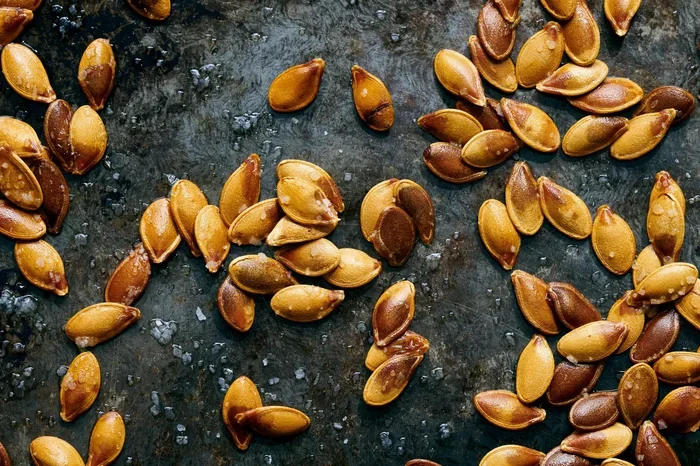
You can also dry onion slices, potato chips, and even flowers for decoration. Homemade trail mix ingredients like dried mango, coconut flakes, and pumpkin seeds come together easily. The possibilities for food dehydrator alternative snacks are endless.
Step-by-Step Dehydration Process
Now that you know the setup and best foods, let’s walk through the actual process. Follow these steps for perfect oven dehydration method results every time.
Slicing and Arranging
Start by slicing your food evenly. Use a sharp knife or a mandoline for consistent thickness. Uniform pieces dry at the same rate, which prevents some from being burnt and others still moist. Place a piece of parchment paper or a silicone baking mat on the oven tray. This prevents sticking and makes cleanup easy.
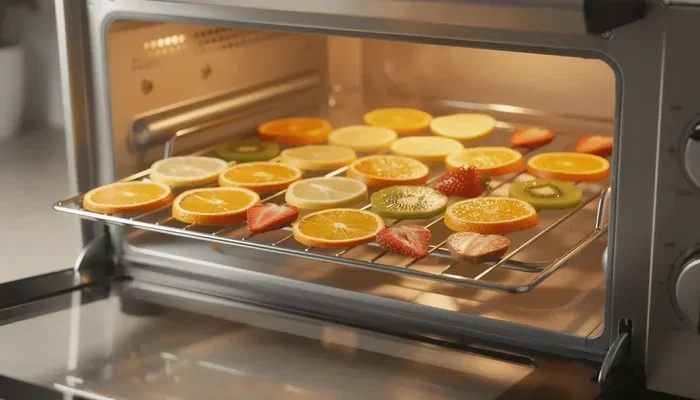
Arrange the slices in a single layer. Do not overlap them. Overlapping traps moisture and leads to uneven drying. Leave a small gap between each piece so air can flow freely. This is crucial for even drying. If your toaster oven has multiple racks, you can use them, but rotate the trays halfway through.
Monitoring and Flipping
Set a timer for the first hour. Check on your food regularly. The drying time varies depending on the food and thickness. Fruits usually take 4–8 hours. Vegetables take 3–6 hours. Jerky takes 2–4 hours. Keep the oven door slightly ajar if possible. This lets moisture escape and prevents condensation from dripping back onto the food.
Use oven mitts to carefully remove the tray. Flip or rotate the pieces every 1–2 hours. This ensures all sides get equal exposure to heat. When the food is done, it should feel dry and leathery, not wet or floppy. Crispy dehydrated vegetables will snap when bent. Dehydrated fruits should be slightly tacky but not wet in the center.
Cooling and Storing
Let the dried food cool completely on the tray. This can take 30 minutes to an hour. Cooling allows the moisture to equalize. If you store food while it’s still warm, condensation can form and ruin the texture. Once cool, store in airtight glass jars or sealed plastic bags.
Keep your shelf-stable snacks in a cool, dark place. Properly dried fruits and vegetables can last 6–12 months. Jerky stays good for 1–2 weeks at room temperature, or longer if refrigerated. Label your containers with the date so you know when to use them.
Toaster Oven vs. Dedicated Dehydrator
Many people wonder if a toaster oven is as good as a food dehydrator. Both have pros and cons. Here’s a quick comparison to help you decide.
| Feature | Toaster Oven | Dedicated Dehydrator |
|---|---|---|
| Cost | Already owned; no extra purchase | $50–$200 for a basic model |
| Capacity | Small; fits 1–2 trays | Large; multiple stackable trays |
| Temperature Range | Usually 120°F–150°F on low settings | 95°F–165°F with precise control |
| Airflow | Convection setting helps; may need rotation | Built-in fan provides consistent airflow |
| Energy Use | Lower for short sessions | Higher for long drying times |
| Best For | Small batches, occasional use | Large batches, frequent use |
A toaster oven is a fantastic food dehydrator alternative. It’s perfect for beginners who want to try dehydration without buying new equipment. If you find yourself drying food often, a dedicated dehydrator might be a good next step. But for now, your toaster oven can do the job beautifully.
Common Mistakes to Avoid
Even with a simple process, a few mistakes can ruin your results. Learning what not to do saves time and food.
Overloading the Oven
The biggest mistake is crowding the tray. Too much food blocks airflow. Moisture gets trapped, and you end up with soggy, unevenly dried snacks. Always leave space between pieces. If you need to dry a large batch, use multiple trays and rotate them. Patience is key for food dehydration success.
Wrong Temperature Settings
Using too high a temperature cooks the food instead of drying it. The outside may look done, but the inside stays wet. This leads to mold growth during storage. Stick to the 125°F–145°F range for most foods. For meats, go up to 160°F to ensure safety. A reliable oven thermometer helps you trust your settings.
Skipping Pre-Treatment
Some foods need a quick dip or blanch to preserve color and nutrients. Skipping this step can result in bland or discolored dried food. A little lemon juice on fruits prevents browning. Blanching vegetables stops enzymes that cause off-flavors. These small steps make a big difference in the final dehydrated snacks.
Expert Tips for Perfect Results
Take your toaster oven dehydration to the next level with these pro tips.
Use parchment paper or a silicone mat to prevent sticking and simplify cleanup. Keep a small fan nearby to help moisture escape if your oven lacks strong convection. For even drying food, cut pieces by hand rather than using a food processor, which can create uneven crumbs. Experiment with flavors by sprinkling spices on before drying. Cinnamon-dipped apple chips or chili-lime mango make amazing treats. Trust your senses; the food should feel dry and leathery, not sticky.
Remember that home drying is an art. Your first batch might not be perfect, and that’s okay. Each session teaches you more about your specific toaster oven. You’ll learn hot spots, ideal timing, and your family’s favorite flavors. Soon, oven dehydration method will become second nature.
Conclusion
Can You Dehydrate Food In A Toaster Oven? Absolutely, and it’s one of the easiest ways to start making healthy, homemade snacks. You now know the right temperature, the best foods to dry, and how to avoid common pitfalls. From crispy kale chips to savory jerky, your toaster oven can do it all. The process is simple, energy efficient, and incredibly rewarding.
Start with one or two of your favorite fruits or vegetables. Follow the steps in this guide and enjoy the process. Toaster oven dehydration opens the door to a world of dried food possibilities. You’ll save money, reduce food waste, and have full control over what you eat. Grab your toaster oven and give it a try today.
Frequently Asked Questions
Is it safe to dehydrate food in a toaster oven?
Yes, it is completely safe when you follow proper temperature guidelines. Keep the heat between 125°F and 160°F depending on the food. Using the convection setting helps ensure even drying and prevents bacteria growth. Always make sure the food is fully dry before storing it to avoid spoilage.
What is the best temperature to dehydrate food in a toaster oven?
The ideal dehydration temperature is 125°F to 145°F for most fruits and vegetables. For meat jerky, raise the temperature to 155°F–160°F to ensure food safety. If your oven doesn’t go that low, use the lowest warm setting and keep a close eye on the food.
How long does it take to dehydrate food in a toaster oven?
Drying times vary by food type and thickness. Fruits like apples and bananas take 4–8 hours. Vegetables like kale and tomatoes take 3–6 hours. Jerky usually takes 2–4 hours. Check the food every hour after the first two hours to prevent over-drying.
Can I use a toaster oven without a convection setting?
Yes, you can still dehydrate food without convection. You’ll need to rotate the trays or flip the food halfway through the drying time. Opening the oven door occasionally also helps release moisture. Convection just makes the process faster and more even, but it’s not required.
What foods should not be dehydrated in a toaster oven?
Avoid dehydrating high-moisture foods like watermelon or cucumbers without a dehydrator, as they may not dry evenly. Also, don’t try to dehydrate dairy or eggs in a toaster oven, as they can become a safety risk. Stick to fruits, vegetables, herbs, and lean meats for the best results.
Do I need to pre-treat food before putting it in the toaster oven?
Pre-treatment is not always required, but it helps. Dipping apple or pear slices in lemon juice prevents browning. Blanching vegetables like broccoli stops enzyme actions that cause off-flavors. For jerky, marinating adds flavor and helps with food safety. These small steps improve the final result.