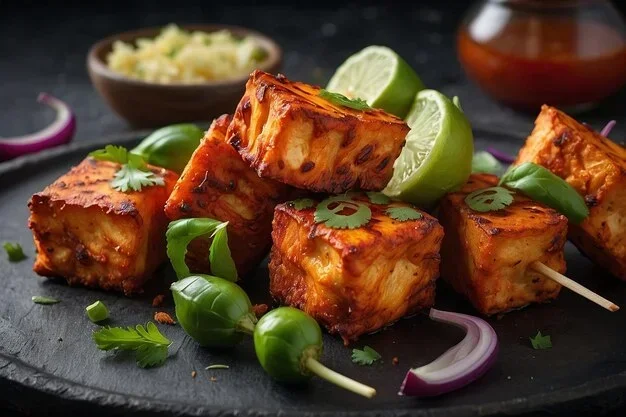
How To Make Paneer Tikka In Oven With Crispy Perfection
Making paneer tikka in oven is the easiest way to get perfectly crispy, smoky Indian appetizers at home. This guide walks you through every step, from marinating the paneer cubes to baking them at the right temperature. You will learn the best tikka spices, kitchen tips, and tricks for oven baked paneer that tastes just like restaurant-style grilled paneer. Whether you are a beginner or a seasoned cook, this paneer tikka recipe will become your go-to favorite.
If you love Indian food but do not have a tandoor, you are not out of luck. Making paneer tikka in oven is one of the easiest ways to enjoy this beloved appetizer right in your own kitchen. The beauty of this method is that you get crispy, golden edges and a smoky flavor without any special equipment. All you need is a hot oven, a baking tray, and a handful of simple ingredients.
Paneer tikka has been a staple of Indian cuisine for decades. Street vendors and restaurant chefs alike swear by the combination of marinated paneer cubes and high heat. But the traditional tandoor method can feel intimidating for home cooks. That is exactly why the oven method has become so popular. It delivers consistent results with far less effort. In this article, you will find a complete guide to making paneer tikka in oven with crispy perfection every single time.
Whether you are preparing this for a weekend dinner party or a quick weeknight snack, this recipe has you covered. I will walk you through the ingredients, the marinating process, the baking steps, and the best ways to serve your creation. By the end, you will feel confident enough to make this dish on repeat. Let us get started.
Key Takeaways
- Oven baked paneer is simple and fast: You can have crispy paneer tikka ready in under 40 minutes with minimal effort.
- The marinade is the secret: A mix of yogurt, tikka spices, and lemon juice gives the paneer cubes deep flavor and a tender texture.
- High heat creates the crispy finish: Baking at 220°C (425°F) with a quick broil at the end gives you that perfect char.
- You do not need a tandoor: Your home oven can replicate the smoky tandoori flavor with just a few smart kitchen tips.
- Serving options are endless: Paneer tikka works great as an appetizer, in wraps, or tossed into a tikka masala sauce.
- Avoid common mistakes: Over-marinating, skipping the oil, and not preheating the oven are the top pitfalls to watch out for.
📑 Table of Contents
- What Is Paneer Tikka and Why Make It in the Oven?
- Ingredients You Need for Perfect Paneer Tikka
- Step-by-Step Paneer Tikka in Oven Recipe
- Tips for Getting Crispy Perfection Every Time
- Serving Suggestions and Pairing Ideas
- Common Mistakes to Avoid When Making Paneer Tikka in Oven
- Expert Insights on Perfecting Your Paneer Tikka
- Key Takeaways
- Conclusion
What Is Paneer Tikka and Why Make It in the Oven?
Paneer tikka is a popular Indian appetizer made by marinating paneer cubes in a spiced yogurt mixture and then cooking them until they are lightly charred and smoky. The word “tikka” refers to small pieces of meat or cheese that are cooked on skewers over high heat. In the traditional version, cooks use a tandoor, which is a cylindrical clay oven that reaches extremely high temperatures. The intense heat creates a beautiful smoky flavor and a slightly crispy exterior.
However, not everyone owns a tandoor. And that is perfectly fine. Your regular home oven works beautifully for this dish. When you make paneer tikka in oven, you get similar results with much more convenience. The oven provides even heat distribution, which helps the paneer cook uniformly. Plus, you can bake a large batch at once, making it ideal for feeding a crowd.
Why Oven Baked Paneer Works So Well
There are several reasons why the oven method is a game changer for making this dish at home. First, the oven allows you to control the temperature precisely. You can set it to a high heat and maintain it throughout the cooking process. This consistency is hard to achieve on a stovetop grill pan.
Second, using a baking tray means less cleanup compared to managing skewers over an open flame. You simply arrange the marinated paneer cubes on the tray, pop them in the oven, and wait. Third, the oven method is very forgiving. Even if you are a beginner in the kitchen, you can still achieve excellent results. The paneer tikka recipe is designed to be simple and straightforward.
Another advantage is the ability to add a quick broil at the end. This mimics the char you would get from a tandoor. Just a few minutes under the broiler gives the oven baked paneer those gorgeous crispy edges and light grill marks. It is a small step that makes a huge difference.
Ingredients You Need for Perfect Paneer Tikka
The beauty of paneer tikka in oven lies in its simplicity. You do not need a long list of exotic ingredients. Most of what you need is already in your spice rack. Here is everything you will require to make this dish.
Essential Ingredients
- Paneer: Use firm, fresh paneer. Cut it into cubes of about one inch each. The firmness holds up well during baking.
- Yogurt: Plain, full-fat yogurt works best for the marinade. It tenderizes the paneer and helps the spices cling to the surface.
- Tikka spices: This includes garam masala, tikka powder, red chili powder, and chaat masala. These are the backbone of the flavor.
- Tandoori masala: This spice blend gives the dish its signature reddish color and smoky aroma. You can find it at any Indian grocery store.
- Lemon juice: A squeeze of fresh lemon adds brightness and helps the marinade penetrate the paneer.
- Vegetable oil or ghee: A small amount of oil prevents the paneer from sticking to the baking tray and adds richness.
- Garlic and ginger paste: These add depth and warmth to the marinade. Fresh is best, but store-bought works too.
- Salt: Adjust to taste. Salt brings out all the other flavors in the marinade.
Optional Add-Ins for Extra Flavor
Once you master the basic recipe, you can experiment with add-ins. These are not required, but they take your paneer tikka recipe to the next level.
- Kasuri methi: Dried fenugreek leaves add a subtle, earthy aroma. Crush them between your palms before adding to the marinade.
- Coriander leaves: Fresh cilantro adds a bright, herbaceous note. Add it to the marinade or use it as a garnish.
- Bell peppers and onions: Tossing in chunks of red bell pepper and onion alongside the paneer creates a colorful, flavorful dish.
- Sesame seeds: A sprinkle of sesame seeds on top before baking adds a nutty crunch.
Understanding Your Tikka Spices
The spice blend is what makes or breaks your paneer tikka in oven. Each spice plays a specific role. Garam masala provides warmth and complexity. Red chili powder adds heat and color. Tikka powder is a pre-mixed blend that simplifies the process. Chaat masala brings a tangy, slightly sweet note. Together, these spices create a balanced flavor profile that is aromatic, slightly spicy, and deeply savory.
If you cannot find tikka powder or tandoori masala, you can make a simple substitute. Mix cumin, coriander, paprika, a pinch of turmeric, and a touch of cayenne pepper. It will not be identical, but it will still produce delicious results. The key is to taste the marinade before adding the paneer. Adjust the seasoning until it smells and tastes amazing.
Step-by-Step Paneer Tikka in Oven Recipe
Now that you have your ingredients ready, let us get into the actual cooking process. Making paneer tikka in oven is a straightforward process, but a few small details can make a big difference in the final result.
Step 1: Prepare the Paneer
Start by cutting your paneer into uniform cubes. About one inch in size works perfectly. Uniform pieces ensure even cooking, so none of your paneer cubes end up undercooked or overcooked. If your paneer feels too soft or fresh, you can soak it in warm water for about 15 minutes. This firms it up slightly and helps it hold its shape during baking.
Pat the cubes dry with a paper towel before adding them to the marinade. Excess moisture on the surface can prevent the spices from sticking properly. A dry surface also helps create that desirable crispy exterior in the oven.
Step 2: Make the Marinade
In a large mixing bowl, add about one cup of thick yogurt. To this, add one teaspoon of turmeric, one teaspoon of garam masala, one teaspoon of tikka powder, half a teaspoon of red chili powder, half a teaspoon of chaat masala, and a pinch of salt. Add one tablespoon of lemon juice and one tablespoon of vegetable oil. Mix in one tablespoon of garlic and ginger paste.
Stir everything together until you have a smooth, well-combined marinade. The consistency should be thick enough to coat the paneer cubes evenly. If it feels too thin, add a little more yogurt. If it feels too thick, a splash of lemon juice can loosen it up.
Step 3: Marinate the Paneer
Add the paneer cubes to the marinade and toss gently until every piece is fully coated. Cover the bowl with cling wrap or a tight-fitting lid. Refrigerate for at least 30 minutes. For the best flavor, marinate for one to two hours. The longer the paneer sits in the tikka marinade, the deeper the flavor will be.
Kitchen tip: Do not marinate the paneer for more than four hours. The acid from the lemon juice and yogurt can break down the paneer texture, making it soft and crumbly. A moderate marinating time is the sweet spot.
Step 4: Preheat and Arrange
Preheat your oven to 220 degrees Celsius, or 425 degrees Fahrenheit. While the oven is heating up, line a baking tray with parchment paper. This prevents sticking and makes cleanup a breeze. Arrange the marinated paneer cubes on the tray in a single layer. Make sure there is space between each piece. Overcrowding the tray leads to steaming instead of roasting, which means you will not get that crispy finish.
If you are adding bell peppers or onions, toss them in a little oil and seasoning and arrange them around the paneer on the same tray. This way, everything cooks together and you get a complete dish in one go.
Step 5: Bake to Crispy Perfection
Place the baking tray in the center of the oven. Bake for 15 to 18 minutes. After about 10 minutes, open the oven and carefully flip each paneer cube using a spatula. This ensures both sides get evenly browned and crispy.
For the last two to three minutes, switch your oven to broil mode. This gives the top surface a beautiful char. Keep a close eye on the tray during this step. The broiler can go from perfectly golden to burnt very quickly.
Once the paneer tikka in oven is done, the cubes should be golden brown on the edges, slightly crispy on the outside, and soft and juicy on the inside. Remove the tray from the oven and let it cool for a couple of minutes before serving.
Step 6: Garnish and Serve
Transfer the crispy oven baked paneer to a serving plate. Garnish with fresh coriander leaves and a squeeze of lemon juice. You can also sprinkle a little chaat masala or kasuri methi on top for extra flavor. Serve immediately while it is still warm and crispy.
Tips for Getting Crispy Perfection Every Time
Getting the perfect crispy texture on your paneer tikka in oven comes down to a few key techniques. These kitchen tips will help you nail it every time.
Use Parchment Paper or a Lightly Oiled Tray
Never place marinated paneer directly on a bare baking tray. The yogurt in the marinade will stick and burn, making cleanup difficult and ruining the appearance of your dish. Parchment paper creates a non-stick surface and allows air to circulate around the paneer. Alternatively, you can lightly brush the tray with oil before arranging the cubes.
Do Not Overcrowd the Tray
This is the single most common mistake people make. When you place too many paneer cubes on one tray, they steam instead of roast. The moisture gets trapped, and you end up with soft, pale cubes instead of crispy, charred ones. Use two baking trays if you need to. It is better to bake in two batches than to overcrowd a single tray.
Flip the Pieces Halfway Through
Flipping the paneer cubes midway through baking ensures even browning on all sides. Use a thin spatula to gently turn each piece. This small step makes a noticeable difference in texture and color.
Let the Paneer Rest Before Serving
Freshly baked paneer tikka is hot and slightly delicate. Letting it rest for two to three minutes allows the exterior to set and become extra crispy. The inside stays soft and juicy, creating a beautiful contrast in texture.
Experiment with Heat Levels
Every oven is different. Some run hotter than others. If your oven tends to run hot, reduce the temperature by 10 degrees. If it runs cool, increase it slightly. Getting to know your oven is one of the best kitchen tips for any dish, and paneer tikka in oven is no exception.
Serving Suggestions and Pairing Ideas
Paneer tikka in oven is incredibly versatile. You can serve it in many different ways depending on the occasion. Here are some of the best pairing ideas to try.
Classic Indian Sides
The most traditional way to serve paneer tikka is alongside a fresh green chutney and some onion rings. A mint-coriander chutney or a tangy tamarind chutney complements the smoky flavors beautifully. You can also serve it with a simple salad of sliced onions, tomatoes, and cucumbers with a squeeze of lemon.
In a Wrap or Paratha
Take your crispy oven baked paneer and stuff it into a warm naan or paratha with some chutney and raw onion. This makes for a satisfying meal that feels like a restaurant-quality wrap. Add some shredded lettuce and a drizzle of cream for extra indulgence.
In a Tikka Masala Sauce
If you prefer a saucier dish, toss your baked paneer tikka into a prepared tikka masala sauce. The sauce adds moisture and richness, and the slightly crispy exterior of the paneer holds up well in the sauce. Serve over steamed basmati rice for a complete meal.
As an Appetizer or Party Snack
Paneer tikka is one of the best Indian appetizers for any gathering. Serve the cubes on a platter with toothpicks for easy snacking. Pair with a side of mint sauce or a simple yogurt dip. Your guests will love it.
Common Mistakes to Avoid When Making Paneer Tikka in Oven
Even with a simple recipe, there are a few pitfalls that can affect your results. Being aware of these mistakes helps you avoid them and achieve the best possible outcome.
Using Soft or Low-Quality Paneer
The texture of your paneer matters a lot. Soft, watery paneer will fall apart in the oven and absorb too much oil. Always choose firm, fresh paneer. If you make paneer at home, use it within a day or two for the best results. Store-bought paneer works fine too, but look for blocks that feel dense and solid.
Skipping the Marinating Step
Some people want to rush the process and skip marinating. Do not do this. The marinade is what transforms plain paneer into flavorful tikka. The yogurt tenderizes the paneer, the spices add depth, and the lemon juice adds a refreshing tang. At the very least, marinate for 30 minutes. Longer is always better.
Not Preheating the Oven
Placing the tray in a cold oven leads to uneven cooking and poor browning. Always preheat your oven before putting the tray inside. A properly preheated oven ensures the paneer starts cooking immediately and develops that crispy exterior from the start.
Using Too Much Oil in the Marinade
While oil is important for preventing sticking and adding richness, too much oil makes the paneer greasy. One tablespoon is sufficient for one cup of marinade. The paneer will release its own moisture during baking, which helps create a natural glaze on the surface.
Opening the Oven Door Too Often
Every time you open the oven door, you lose heat and disrupt the cooking environment. This can lead to uneven browning and longer cooking times. Resist the urge to check too frequently. Open the door only to flip the pieces once, halfway through baking.
Expert Insights on Perfecting Your Paneer Tikka
Chef tips for oven baked paneer: Many professional cooks recommend brushing the paneer cubes lightly with oil before placing them in the oven. This creates an extra layer of protection against drying out and promotes faster browning. Another expert trick is to add a tiny pinch of smoked paprika to the marinade. It enhances the smoky flavor that is characteristic of traditional tandoori paneer tikka.
For the best tikka spices blend, look for products from reputable Indian brands. The quality of the spice blend matters more than people realize. Fresh, high-quality spices produce a vibrant, aromatic marinade that elevates the entire dish. If you have whole spices at home, toasting them briefly and grinding them fresh gives you an even more intense flavor profile.
When it comes to serving, the presentation matters. Arrange the crispy paneer cubes on a white platter with colorful garnishes. A sprinkle of finely chopped coriander, a few slices of green chili, and a wedge of lemon make the dish look as appetizing as it tastes. This is especially important if you are serving guests or bringing the dish to a potluck.
One final expert tip: if you want to meal prep, you can marinate the paneer the night before and store it in the refrigerator. In the morning, simply arrange it on the tray and bake. This saves time and allows the flavors to develop even further overnight. The result is incredibly flavorful paneer tikka in oven with minimal effort on the day you cook.
Key Takeaways
- Oven baked paneer is simple and fast: You can have crispy paneer tikka ready in under 40 minutes with minimal effort.
- The marinade is the secret: A mix of yogurt, tikka spices, and lemon juice gives the paneer cubes deep flavor and a tender texture.
- High heat creates the crispy finish: Baking at 220°C (425°F) with a quick broil at the end gives you that perfect char.
- You do not need a tandoor: Your home oven can replicate the smoky tandoori flavor with just a few smart kitchen tips.
- Serving options are endless: Paneer tikka works great as an appetizer, in wraps, or tossed into a tikka masala sauce.
- Avoid common mistakes: Over-marinating, skipping the oil, and not preheating the oven are the top pitfalls to watch out for.
Conclusion
Making paneer tikka in oven is one of the most rewarding things you can do in your kitchen. It is simple, fast, and delivers results that rival any restaurant. The combination of a well-spiced marinade, high heat, and a little patience gives you crispy, flavorful paneer cubes that everyone will love.
Whether you are a vegetarian looking for a protein-packed snack or an Indian food enthusiast wanting to recreate your favorite dish at home, this recipe delivers every time. The beauty of this paneer tikka recipe is that it is endlessly customizable. Change the spice levels, add different vegetables, or experiment with new garnishes. Once you master the basic method, you can make it your own.
So the next time you are craving something smoky, spicy, and satisfying, skip the takeout and head to your kitchen. With just a few ingredients and your trusty oven, you can create a dish that is crispy on the outside, tender on the inside, and bursting with authentic Indian flavor. Your paneer tikka in oven journey starts now. Enjoy every bite.
Frequently Asked Questions
Can I use store-bought paneer for paneer tikka in oven?
Yes, store-bought paneer works perfectly for this recipe. Just make sure it is firm and fresh. If the paneer feels soft or watery, soak it in warm water for 15 minutes to firm it up before marinating and baking.
How long can I marinate paneer tikka before baking?
The ideal marinating time is between one and two hours. You can marinate for as little as 30 minutes in a pinch, but longer marination develops deeper flavor. Avoid marinating for more than four hours, as the acid in the marinade can break down the paneer texture.
Can I make paneer tikka in oven without yogurt?
Yogurt is the traditional base for the marinade and helps tenderize the paneer. However, you can substitute it with coconut cream or a dairy-free yogurt if needed. The result will be slightly different in texture but still delicious.
What temperature should I bake paneer tikka at?
Bake at 220 degrees Celsius, or 425 degrees Fahrenheit. This high heat creates the crispy exterior and light char that makes paneer tikka so appealing. For the last two to three minutes, switch to broil mode for extra browning.
Can I freeze leftover paneer tikka?
Yes, you can freeze leftover paneer tikka. Let it cool completely, then store it in an airtight container. Reheat in the oven at 180 degrees Celsius for about five minutes. Note that the texture may be slightly softer after reheating compared to freshly baked.
Is paneer tikka in oven healthy?
Paneer tikka is a relatively healthy dish. Paneer is a good source of protein and calcium. Baking instead of deep-frying reduces the fat content significantly. To make it even healthier, use low-fat yogurt and minimize the oil in the marinade.