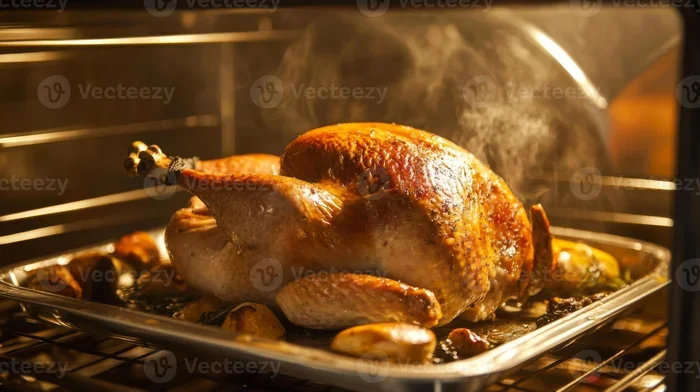
How To Make A Moist Turkey In The Oven Step By Step
Learning how to make a moist turkey in the oven is easier than you think. This step-by-step guide covers everything from brining to roasting so your turkey stays juicy and flavorful. Whether it is Thanksgiving or a weekend dinner, these simple tips guarantee a perfectly cooked oven roasted turkey every single time.
There is nothing quite like a perfectly roasted turkey sitting on the dinner table. The aroma fills the kitchen, the skin turns golden brown, and everyone gathers around expecting something special. But too often, the reality is a dry, bland bird that leaves guests reaching for extra gravy.
If you have ever wondered how to make a moist turkey in the oven, you are in the right place. This guide walks you through every single step with clear instructions and practical tips. You will learn how to choose the right bird, brine it properly, roast it at the perfect temperature, and serve a juicy turkey that everyone will rave about.
The secret to a great oven roasted turkey is not magic. It is about preparation, patience, and understanding a few simple principles. Once you know these, you will never serve a dry turkey again. Let us dive in and make this the best turkey you have ever cooked.
Key Takeaways
- Brining is essential: A wet or dry brine locks in moisture and adds deep flavor to your turkey.
- Use a meat thermometer: Cooking to the right internal temperature prevents dry meat and ensures food safety.
- Let the turkey rest: Resting for at least 30 minutes redistributes juices for a juicier result.
- Dry the skin thoroughly: Patting the skin dry before roasting leads to crispy, golden skin.
- Baste regularly: Basting every 30 to 45 minutes keeps the meat moist and builds flavor.
- Use pan drippings for gravy: The drippings left behind are liquid gold for making rich turkey gravy.
- Avoid overcooking: Pulling the turkey out at the right time is the single biggest factor in moisture.
📑 Table of Contents
Why Oven Roasted Turkey Comes Out Moist
Understanding the basics helps you cook a better turkey. When you know why certain methods work, you can apply them with confidence. A moist turkey is not just about adding more liquid. It is about controlling heat, timing, and flavor.
The Science Behind a Juicy Turkey
Turkey meat is mostly protein and water. When you cook it, the proteins tighten and squeeze out moisture. This is why overcooked turkey feels dry. The goal is to cook the bird enough to be safe and tender without squeezing out all the liquid.
Fat plays a big role too. The layer of fat under the skin melts during cooking and bastes the meat from the inside. This is why keeping the skin on matters so much. The skin acts as a natural barrier that slows moisture loss.
Brining is another powerful tool. Soaking the turkey in a saltwater solution or rubbing it with dry salt changes the protein structure. It allows the meat to hold onto more water during cooking. This simple step makes a noticeable difference in every bite.
Why the Oven Method Works
Roasting a turkey in the oven gives you even heat distribution. Unlike grilling or frying, the oven surrounds the bird with consistent warmth. This gentle cooking process helps the meat cook slowly and retain moisture.
You also have full control over the temperature. You can start at a higher heat to crisp the skin, then lower it to cook the meat through gently. This two-stage approach is one of the best kept secrets for a moist turkey in the oven.
What You Need: Ingredients and Tools
Before you start cooking, gather everything you need. Having all your tools and ingredients ready makes the process smooth and stress free. Here is your complete checklist.
Ingredients for a Flavorful Turkey
- Whole turkey: Choose a fresh or fully thawed bird, ideally 12 to 14 pounds for even cooking.
- Kosher salt: Essential for brining or dry rubbing. It draws out moisture and seasons deeply.
- Butter or olive oil: Used to rub under the skin for extra richness and crispiness.
- Fresh herbs: Thyme, rosemary, and sage add classic savory flavor.
- Garlic and onion: Halved cloves and wedges go inside the cavity for aromatic flavor.
- Citrus: Lemon or orange slices add brightness to the meat.
- Chicken broth: Add a cup to the bottom of the pan to create steam and prevent drying.
Essential Tools You Will Need
- Large roasting pan: Choose one with a rack so air circulates around the bird.
- Meat thermometer: This is non negotiable. It tells you exactly when the turkey is done.
- Aluminum foil: Used to tent the turkey if the skin browns too quickly.
- Basting brush or spoon: For brushing pan juices over the turkey during cooking.
- Sharp knife and cutting board: For prepping herbs and vegetables.
- Large bowl or brining bag: For brining the turkey overnight.
Choosing the Right Turkey
Not all turkeys are created equal. A fresh, free range bird often has better flavor and texture than a frozen one. If you buy frozen, make sure you thaw it completely in the refrigerator for at least 24 hours per 4 to 5 pounds.
Look for a turkey with a good layer of fat under the skin. This fat melts during cooking and keeps the meat moist. Avoid turkeys that look thin or have dry skin. The size matters too. A bird that is too small can dry out quickly, while one that is too large may cook unevenly.
How To Brine Your Turkey for Maximum Juiciness
Brining is the single most important step for making a moist turkey. It takes a little planning but the results are absolutely worth it. There are two main methods: wet brining and dry brining. Both work well, so choose the one that fits your schedule.
Wet Brine Method
A wet brine is a saltwater solution that you submerge the turkey in for 12 to 24 hours. The salt penetrates the meat and changes the protein structure so it holds more water during cooking.
To make a basic wet brine, dissolve one cup of kosher salt in one gallon of cold water. Add sugar, bay leaves, peppercorns, and any herbs you like. Place the turkey in a large container or brining bag, pour in the solution, and refrigerate. Make sure the turkey stays fully submerged at all times.
After brining, rinse the turkey thoroughly under cold water and pat it completely dry. This step removes excess salt from the surface and helps the skin crisp up in the oven.
Dry Brine Method
Dry brining is simpler and requires less space. Simply rub kosher salt all over the turkey, including under the skin of the breast. Place the bird uncovered on a rack in the refrigerator for 12 to 24 hours.
The salt draws moisture out of the meat, then it gets reabsorbed along with the salt. This seasons the turkey deeply and improves its ability to retain moisture. Dry brining also dries the skin, which leads to crispier results when roasting.
How Long To Brine
For a 12 to 14 pound turkey, 12 to 24 hours is ideal. Do not brine for more than 48 hours or the meat can become too salty. If you are short on time, even 4 to 6 hours of brining helps. Just do not skip this step if you want the juiciest possible result.
Step by Step Oven Turkey Recipe
Now for the fun part. This is where all your preparation pays off. Follow these steps carefully and you will have a show stopping oven roasted turkey that is juicy inside and crispy outside.
Step One: Prep the Turkey
Remove the turkey from the refrigerator one hour before cooking. Let it come to room temperature. This ensures more even cooking throughout the bird. Preheat your oven to 425 degrees Fahrenheit for the first 30 minutes.
Remove the giblets and neck from the cavity. Rinse the turkey inside and out with cold water, then pat it completely dry with paper towels. The drier the skin, the crispier it will get. This is a detail many people overlook.
Step Two: Season Generously
Mix softened butter with minced garlic, chopped herbs, salt, and pepper. Gently loosen the skin over the breast and thighs with your fingers. Spread the butter mixture directly under the skin. This is the secret to flavorful, moist white meat.
Rub the remaining butter mixture all over the outside of the bird. Season the cavity with salt and pepper. Stuff it with halved lemons, onion wedges, garlic cloves, and fresh herb sprigs. These aromatics infuse the meat with flavor as it cooks.
Step Three: Roast at High Heat First
Place the turkey breast side up on a roasting rack inside your pan. Pour one cup of chicken broth into the bottom of the pan. This creates steam that keeps the environment moist.
Roast the turkey at 425 degrees Fahrenheit for 30 minutes. This high heat kick starts the browning process and crisps the skin. After 30 minutes, reduce the oven temperature to 325 degrees Fahrenheit and continue roasting.
Step Four: Baste and Monitor
Every 30 to 45 minutes, open the oven and baste the turkey with the pan juices. Use a spoon or basting bulb to scoop up the liquid and pour it over the bird. This keeps the surface moist and builds layers of flavor.
Start checking the internal temperature after about two and a half hours. Insert the turkey thermometer into the thickest part of the thigh, avoiding the bone. The target temperature is 165 degrees Fahrenheit in the thickest part of the breast and 175 degrees Fahrenheit in the thigh.
Step Five: Tent and Rest
Once the turkey reaches the right temperature, remove it from the oven. Cover it loosely with aluminum foil to tent it. This traps heat and allows the juices to redistribute throughout the meat.
Let the turkey rest for at least 30 minutes before carving. This is one of the most important steps people skip. Cutting too early lets all the juices run out onto the cutting board instead of staying in the meat. Patience here makes a huge difference.
Tips for Crispy Skin and Juicy Meat
Getting the perfect balance between crispy skin and juicy meat takes a little extra attention. But these tips make it much easier and take your turkey recipe from good to great.
Dry the Skin Overnight
After brining and rinsing, pat the turkey dry and place it uncovered in the refrigerator overnight. This dries the skin significantly, which leads to much crispier results. The drier the skin, the better it crisps in the oven.
Use Butter Under the Skin
Butter is your best friend when it comes to flavor and moisture. Rubbing it under the skin of the breast and thighs adds richness and helps the skin brown beautifully. Use unsalted butter so you can control the salt level.
Do Not Overcook
Overcooking is the number one cause of dry turkey. The difference between a perfectly juicy bird and a dry one can be just a few degrees. Always use a meat thermometer and pull the turkey out as soon as it hits the target temperature. The carryover heat will raise it another 5 to 10 degrees as it rests.
Add Liquid to the Pan
Adding chicken broth, wine, or water to the bottom of the roasting pan creates steam. This moist environment prevents the turkey from drying out, especially during the longer cooking phases. Check the pan periodically and add more liquid if it evaporates too much.
Cook Breast Side Up
Roasting the turkey breast side up allows the heat to circulate evenly. The breast meat is more delicate and dries out faster than dark meat, so keeping it exposed to gentle heat helps maintain moisture. Some cooks start breast side down for the first hour, but breast side up is the most reliable method.
Common Mistakes That Dry Out Your Turkey
Even experienced cooks make mistakes that lead to dry turkey. Knowing what to avoid saves you from a disappointing meal. Here are the most common errors and how to fix them.
Skipping the Brine
Many people skip brining because it seems like extra work. But brining is the easiest way to guarantee a moist result. If you do not have time for a full wet brine, at least do a dry brine. Even a few hours of salt contact improves moisture retention significantly.
Cooking at Too Low a Temperature
Some recipes suggest cooking at very low temperatures for a long time. While this sounds gentle, it can actually dry out the meat. The low heat does not render the fat properly and the long cooking time causes the juices to evaporate. A higher starting temperature followed by a moderate roast works much better.
Not Using a Thermometer
Relying on cooking time alone is risky. Every oven is different and every turkey varies in size and shape. A meat thermometer takes the guesswork out completely. It is the most important tool you can own for roasting a juicy turkey.
Cutting Too Soon
It is tempting to carve the turkey as soon as it comes out of the oven. But cutting too soon releases all the juices before they have a chance to settle back into the meat. Give it at least 30 minutes of resting time. Use this time to prepare your turkey gravy from the pan drippings.
Over Stuffing the Cavity
Stuffing the turkey cavity with too many ingredients blocks heat circulation and can lead to uneven cooking. Use a few lemon halves, onion quarters, and herb bundles. Keep the stuffing light so the heat can flow freely around the bird.
Making Gravy from Pan Drippings and Serving Your Turkey
The pan drippings left behind after roasting are packed with flavor. They are the foundation for a rich, delicious gravy that elevates the entire meal. Here is how to make the most of them.
Making Simple Turkey Gravy
Place the roasting pan on the stovetop over medium heat. Add a cup of chicken broth and scrape up all the browned bits from the bottom of the pan. These bits, called fond, are full of concentrated flavor.
In a separate saucepan, melt a tablespoon of butter and whisk in two tablespoons of flour. Cook for one minute to remove the raw flour taste. Slowly pour in the pan drippings while whisking constantly. Continue cooking until the gravy thickens to your desired consistency. Season with salt and pepper to taste.
Strain the gravy through a fine mesh sieve to remove any bits of herbs or seasoning. This gives you a smooth, elegant finish. Your turkey gravy will taste far better than anything from a box mix.
Carving and Serving Tips
When it is time to carve, use a sharp knife and a sturdy fork. Start by removing the twine and any cavity stuffing. Slice along the breastbone and cut the breast meat into even slices. Then remove the thighs and drumsticks by cutting through the joints.
Serve the turkey warm with your favorite sides. Mashed potatoes, roasted vegetables, cranberry sauce, and stuffing all pair beautifully. The turkey juices from carving can be drizzled over the meat for extra moisture and flavor.
Storing Leftovers Safely
Refrigerate leftover turkey within two hours of cooking. Store the meat and gravy in separate airtight containers. Sliced turkey stays fresh for up to four days in the refrigerator. You can also freeze cooked turkey for up to three months. Reheat gently in the oven at 325 degrees Fahrenheit to keep it from drying out.
Making a moist turkey in the oven does not have to be intimidating. With the right preparation and a little patience, you can roast a bird that is juicy, flavorful, and beautifully golden. The key is in the details: brine the turkey, season generously, monitor the temperature, and let it rest before carving.
This oven roasted turkey method works every time, whether you are cooking for Thanksgiving dinner or a simple Sunday family meal. Once you master these steps, you will never go back to dry, overcooked turkey again. Your family and guests will thank you for it.
Start with a fresh, well sized bird. Take the time to brine it properly. Use a reliable thermometer and resist the urge to overcook. Follow these guidelines and you will pull a stunning, juicy turkey out of your oven that earns you compliments all night long. Happy roasting.
Frequently Asked Questions
How long does it take to cook a turkey in the oven?
A general rule is about 13 to 15 minutes per pound at 325 degrees Fahrenheit after the initial high heat phase. A 12 to 14 pound turkey typically takes about 3 to 3.5 hours total. Always rely on the internal temperature rather than time alone.
Should I cover my turkey with foil while roasting?
You do not need to cover the turkey for the entire cook. However, if the skin is browning too quickly, you can tent it loosely with aluminum foil. Remove the foil for the last 30 minutes to let the skin crisp up fully.
What is the best internal temperature for a moist turkey?
The turkey is done when the thickest part of the breast reaches 165 degrees Fahrenheit and the thigh reaches 175 degrees Fahrenheit. Pulling it out at these temperatures ensures the meat stays moist and juicy without being undercooked.
Can I brine a turkey for too long?
Yes, brining for more than 48 hours can make the turkey too salty and change the texture. For most birds, 12 to 24 hours is the sweet spot. If you use a very concentrated brine, reduce the time accordingly.
How do I keep white meat from drying out?
Rub butter under the skin of the breast before roasting. Baste the bird every 30 to 45 minutes. And use a meat thermometer to avoid overcooking. White meat dries out faster than dark meat, so pulling the turkey out at the right temperature is critical.
Is it better to brine wet or dry for a moist turkey?
Both methods work well. Wet brining adds more moisture to the meat, while dry brining seasons more deeply and dries the skin for crispier results. If you are short on time or refrigerator space, dry brining is the simpler and equally effective choice.