How To Make Sourdough Bread In Your Home Oven Today
Making sourdough bread in oven at home is easier than you think. This guide walks you through every step, from building a sourdough starter to pulling a golden, crusty loaf out of your oven. You will learn proven techniques for fermentation, proofing bread, and baking bread like a pro. Follow along and bake your first artisanal loaf today.
Key Takeaways
- Start Simple: You only need flour, water, salt, and a mature sourdough starter to begin.
- Fermentation Matters: Proper bulk fermentation and proofing create the best flavor and texture.
- Oven Spring Is Key: Steam and high heat help your loaf rise beautifully in the oven.
- Scoring Makes a Difference: Cutting the dough controls how your bread expands while baking.
- Patience Pays Off: Letting the dough rest and rise properly leads to a better crumb structure.
- Troubleshooting Helps: Knowing common mistakes saves time and improves your results fast.
- Practice Makes Perfect: Every bake teaches you something new about your oven and your dough.
📑 Table of Contents
- What You Need Before You Start Baking Sourdough Bread In Your Oven
- How To Create Your Sourdough Starter From Scratch
- Mixing and Preparing the Dough
- Fermentation and Proofing Your Loaf
- Baking Sourdough Bread In Your Oven
- Common Mistakes and How To Avoid Them
- Tips for Better Sourdough Every Time
- Storing Your Homemade Sourdough Bread
- Conclusion
What You Need Before You Start Baking Sourdough Bread In Your Oven
Before you dive into baking sourdough bread in oven, you need a few basics. You do not need fancy equipment. You need the right ingredients, a little patience, and a hot oven. Let us walk through what you need.
Essential Ingredients for Sourdough Bread
The ingredient list is simple. You need bread flour, water, salt, and a yeast culture from your starter. Bread flour has more protein than all-purpose flour. This extra protein builds a strong gluten network. A strong gluten network gives you that open, airy crumb structure everyone loves.
Use filtered water if your tap water is heavily chlorinated. Chlorine can slow down your fermentation. Salt is essential for flavor and for controlling the yeast. I recommend using fine sea salt or kosher salt. Avoid iodized salt if you can. Iodine can affect the yeast activity.
Equipment Checklist
Here is what you need in your kitchen to make sourdough bread in oven:
- A large mixing bowl
- A kitchen scale (grams are much more accurate than cups)
- A bench scraper
- A banneton or proofing basket
- A Dutch oven or baking stone
- A lame or razor blade for scoring
- Parchment paper
- A spray bottle for water
You do not need all of this on day one. A Dutch oven works great for beginners. It traps steam and creates a wonderful crusty bread crust. A baking stone is a great upgrade later.
How To Create Your Sourdough Starter From Scratch
A sourdough starter is the heart of every loaf. It is a living yeast culture made from flour and water. Wild yeast and bacteria feed on the flour. This creates natural leavening power. You can buy a starter, but making one is fun and rewarding.
Day-by-Day Starter Guide
Building a starter takes about 7 to 10 days. Here is how to do it:
- Day 1: Mix 50 grams of flour and 50 grams of water in a clean jar. Stir well. Cover loosely and let it sit at room temperature.
- Day 2: You may see some bubbles. That is a good sign. Discard half and feed with 50 grams of flour and 50 grams of water.
- Days 3 to 7: Keep feeding every 24 hours. Bubbles should increase each day. The mixture will start to smell tangy.
- Day 7 to 10: Your starter should double in size within 4 to 6 hours after feeding. It is ready to bake with.
Do not rush this process. A mature starter gives you the best sourdough recipe results. If you already have a starter, skip ahead to the next section.
Signs Your Starter Is Ready
A healthy starter passes the float test. Drop a spoonful into a glass of water. If it floats, it is ready. It should also smell pleasantly tangy and fruity. If it smells like acetone or nail polish remover, it needs more feedings. Keep it at room temperature and feed it regularly before you use it for bread baking.
Mixing and Preparing the Dough
Now comes the fun part. You are going to mix your dough and start the journey toward a beautiful loaf of sourdough bread in oven. This stage sets the foundation for everything that follows.
The Autolyse Method
Autolyse is a fancy word for a simple step. Mix your flour and water first. Let it rest for 30 to 60 minutes. This allows the flour to fully hydrate. Gluten starts developing on its own. The dough becomes easier to work with later.
For a basic loaf, use 500 grams of bread flour and 350 grams of water. Mix until no dry flour remains. Cover the bowl and wait. This step is called autolyse and it is a game changer. It makes mixing faster and improves the final texture of your artisanal bread.
Adding Salt and Starter
After the autolyse, add 100 grams of salt and 100 grams of active starter. Mix thoroughly. Use the stretch and fold method. Reach down, stretch the dough up, and fold it over itself. Do this four times, turning the bowl a quarter turn each time.
Cover the bowl and let the dough rest for 30 minutes. Then do another set of stretch and folds. Repeat this process four times over about two hours. This gentle mixing builds strength in the dough without overworking it.
Fermentation and Proofing Your Loaf
Fermentation is where the magic happens. This is when the wild yeast in your starter eats the sugars in the flour. It produces carbon dioxide and flavor compounds. Proper bulk fermentation is the most important step in making great sourdough.
Bulk Fermentation Basics
Bulk fermentation is the first rise. It happens in the bowl before you shape the loaf. During this time, the dough expands and develops flavor. The dough should increase in size by about 50 to 75 percent.
Here is how to know when bulk fermentation is done:
- The dough looks puffy and airy on top
- It has increased by at least 50 percent in volume
- Small bubbles form on the surface
- The edges look slightly domed
- The dough feels light and jiggly when you shake the bowl
Time is a guide, not a rule. Room temperature affects fermentation speed. A warm kitchen (75 to 78 degrees Fahrenheit) works best. Cold kitchens slow things down. Watch the dough, not the clock.
Shaping Your Loaf
Once bulk fermentation is complete, it is time to shape. Gently turn the dough out onto a lightly floured surface. Use a bench scraper to help. Shape it into a round or oval, depending on your preference.
The goal is to create surface tension. This tension helps the loaf hold its shape during the final proof and in the oven. A tight shape leads to better oven spring. Oven spring is the final burst of rising that happens when the dough hits the hot oven.
Final Proofing
Place your shaped loaf seam-side up in a floured banneton. Cover it and put it in the refrigerator for 12 to 16 hours. This is called a cold retard. It slows fermentation and develops deeper flavor. It also makes scheduling your bake much easier.
Before baking, take the banneton out of the fridge. Let the dough warm up for 30 to 45 minutes. This helps the dough relax. It also ensures even proofing bread results in the oven.
Baking Sourdough Bread In Your Oven
This is the moment you have been waiting for. Baking sourdough bread in oven requires high heat and steam. Together, they create a thin, crackling crust and a soft, airy interior. Let us walk through the process step by step.
Preheating and Steam
Place your Dutch oven or baking stone in the oven. Preheat to 475 to 500 degrees Fahrenheit. Let the oven heat for at least 45 minutes. A thoroughly preheated oven is essential for great oven spring.
Steam is critical in the first 15 to 20 minutes of baking. Steam keeps the crust soft. This allows the dough to expand fully before the crust sets. A Dutch oven traps moisture naturally. If you use a baking stone, spray water into the oven when you load the loaf. You can also place a pan of water on the bottom rack.
Scoring the Dough
Before you bake, score the dough with a sharp blade. Use a lame or a very sharp knife. Score about half an inch deep. The cut should be confident and swift.
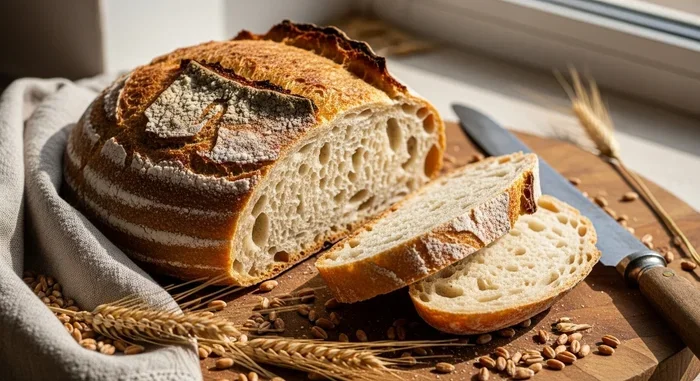
Scoring bread serves two purposes. First, it controls where the loaf expands. Second, it creates a beautiful ear on the crust. The ear is that signature curl at the edge of a crusty bread loaf. Practice makes perfect here. Do not worry if your first few scores are not perfect.
Baking Time and Temperature
Bake the loaf covered for the first 20 minutes. This traps steam and promotes oven spring. Then remove the lid and bake for another 20 to 25 minutes. The crust should turn deep golden brown.
Here is a quick temperature guide:
- 475 degrees Fahrenheit for a thicker, chewier crust
- 500 degrees Fahrenheit for a thinner, cracklier crust
- Reduce to 450 degrees after removing the lid
The internal temperature of the loaf should reach 205 to 210 degrees Fahrenheit when done. Use an instant-read thermometer to check. Pull the loaf out and let it cool on a wire rack. Do not cut into it right away. The inside is still cooking as it cools.
Common Mistakes and How To Avoid Them
Everyone makes mistakes when learning how to make sourdough bread in oven. Here are the most common ones and how to fix them.
Dense or Heavy Loaf
A dense loaf usually means the fermentation was too short or too weak. Your starter may not have been active enough. Or the bulk fermentation was too short. Make sure your starter passes the float test. Give the dough enough time to rise during bulk fermentation. Room temperature matters a lot here.
Too Sour or Not Sour Enough
Sourdough flavor depends on fermentation time and temperature. A long, warm bulk fermentation creates more sourness. A shorter, cooler fermentation is milder. If your bread is too sour, shorten the bulk fermentation or use a smaller amount of starter. If it is not sour enough, extend the fermentation or use a larger starter percentage.
Flat Loaf With No Oven Spring
A flat loaf usually means the dough was over-proofed or under-proofed. Over-proofed dough has exhausted its gas production. It cannot rise further in the oven. Under-proofed dough has not developed enough gas. Shape the dough tightly and give it the right amount of time for the final proof. Watch the dough closely, not just the clock.
Tips for Better Sourdough Every Time
Once you have baked a few loaves, these tips will help you improve. Great bread baking comes from paying attention to small details.
- Use a kitchen scale: Baking by weight is far more accurate than measuring cups
- Keep notes: Write down times, temperatures, and how the dough felt each day
- Be patient: Sourdough cannot be rushed. Let the dough tell you when it is ready
- Use your sourdough discard: Do not throw away discard. Make pancakes, crackers, or crackers from it
- Experiment with hydration: Try different water-to-flour ratios to find your perfect crumb structure
- Learn your oven: Every oven has hot spots. Use an oven thermometer to find yours
- Invest in a banneton: A good proofing basket makes shaping easier and results more consistent
Remember, every baker started somewhere. Your first loaf may not be perfect. That is perfectly fine. Each bake teaches you something new about your dough, your sourdough starter, and your oven. The more you bake, the better you get.
Storing Your Homemade Sourdough Bread
Fresh sourdough bread in oven keeps best at room temperature. Store it in a paper bag or wrapped in a clean kitchen towel. This keeps the crust crisp for 2 to 3 days. After that, the bread will start to firm up.
If you want to keep it longer, slice the loaf and freeze it. Sourdough freezes beautifully. Toast slices straight from the freezer. They come out perfectly crispy. You can also refresh day-old bread in the oven at 350 degrees for 5 minutes. This brings back some of the crusty texture.
Never store sourdough in the refrigerator. The cold accelerates staling. It also changes the texture of the crumb. Room temperature storage is always best for crusty bread.
Conclusion
Making sourdough bread in oven at home is one of the most rewarding things you can do in the kitchen. It takes a little patience and a lot of practice. But the results are worth every minute. From creating your sourdough starter to pulling a golden, crusty bread loaf out of the oven, the process connects you to an ancient tradition of bread baking.
Start with the basics. Master the fermentation and proofing steps. Learn how your oven behaves. Each bake will teach you something new. Soon you will be producing artisanal bread that rivals your favorite bakery. The key is to keep going, keep learning, and enjoy the process.
Now that you know how to make sourdough bread in oven, it is time to get started. Gather your ingredients. Feed your starter. Preheat your oven. And bake your first loaf today. You will be glad you did.
Frequently Asked Questions
How long does it take to make sourdough bread in oven?
Total time is about 24 to 48 hours, mostly due to fermentation and proofing. Active hands-on time is only about 45 minutes to one hour. The dough does most of the work on its own while you go about your day.
Can I use all-purpose flour instead of bread flour?
Yes, you can. Bread flour gives a better rise and chewier texture because of its higher protein content. All-purpose flour works too, but your loaf may be a bit denser. A blend of both flours is a great middle ground for beginners.
Do I really need a Dutch oven to bake sourdough?
A Dutch oven is the easiest way for beginners. It traps steam and creates excellent oven spring. However, you can also use a baking stone or a baking sheet with a pan of water underneath. The Dutch oven just makes the process simpler and more consistent.
Why did my sourdough bread turn out flat?
A flat loaf usually means over-proofing or under-proofing. The dough may have risen too long and lost its strength. Or it did not rise enough before baking. Watch the dough closely and use the poke test. If it springs back slowly, it is ready to bake.
How do I know when sourdough bread is done baking?
The crust should be deep golden brown. Tap the bottom of the loaf. It should sound hollow. Use an instant-read thermometer to check the internal temperature. It should read 205 to 210 degrees Fahrenheit for a perfectly baked loaf.
Can I make sourdough without a starter?
No, a sourdough starter is essential. It provides the natural yeast that makes the bread rise. You can create a starter in about 7 to 10 days using just flour and water. Once you have a healthy starter, you can use it indefinitely for all your sourdough baking needs.
=== CONCLUSION ===
Baking sourdough bread in oven at home is a skill anyone can learn. You need a few simple ingredients, basic equipment, and a little time. Follow the steps in this guide and you will bake crusty bread with a beautiful open crumb and deep, complex flavor. Start small, stay patient, and enjoy every loaf. Your journey into bread baking starts right now.