How To Clean Out Toaster Oven With Simple Household Items
Cleaning your toaster oven doesn’t require harsh chemicals or expensive products. You can use everyday household items like baking soda, vinegar, and lemon juice to remove grease, food residue, and burnt-on stains. This guide walks you through every step to make your toaster oven cleaning quick, safe, and surprisingly easy.
There’s nothing worse than pulling out your toaster oven and seeing a layer of grease, crumbs, and burnt food staring back at you. Whether you use it daily for toast or occasionally for reheating pizza, a dirty oven affects how your food tastes and even how safely it works. The good news is you don’t need fancy store-bought cleaners to fix this. With a few simple household items, you can make your toaster oven cleaning fast, effective, and completely chemical-free.
In this guide, I’ll show you exactly how to clean out toaster oven using things you probably already have in your kitchen. From the interior walls to the crumb tray, from the glass door to the outside surface, we’ll cover it all. You’ll learn practical tips, common mistakes to avoid, and expert tricks that make the whole process a breeze. Let’s get started.
Key Takeaways
- Use baking soda and vinegar: These two simple ingredients tackle most grease and grime inside your oven.
- Clean the crumb tray regularly: Removing the crumb tray after each use prevents buildup and odors.
- Soak removable parts: Soaking trays and racks in warm soapy water loosens stuck-on food easily.
- Never use abrasive scrubbers: They can damage the interior coating of your oven.
- Wipe down after every use: Quick daily maintenance saves you from deep cleaning later.
- Lemon juice is a natural deodorizer: It removes stubborn smells from the oven interior.
- Clean the exterior too: A full clean includes the outside, door glass, and control panel.
📑 Table of Contents
- Why Regular Toaster Oven Cleaning Matters
- Gather Your Household Cleaning Supplies
- Step-by-Step Guide to Clean Out Toaster Oven
- Quick Tips for Easier Cleaning
- Common Mistakes to Avoid When Cleaning a Toaster Oven
- Expert Insights on Maintaining a Clean Toaster Oven
- How Often Should You Deep Clean Your Toaster Oven?
- Benefits of Using Household Items Instead of Commercial Cleaners
- Conclusion
Why Regular Toaster Oven Cleaning Matters
Many people forget about cleaning their toaster oven until it starts smelling burnt or smoking. That’s a problem. Regular toaster oven cleaning does more than just keep it looking nice. It actually improves how well the oven works and how long it lasts.
Prevents Fire Hazards
Crumbs and grease buildup inside the oven can catch heat and potentially cause smoke or even small fires. When food residue sits on the heating elements, it becomes a serious safety risk. Cleaning your oven regularly removes this danger and keeps your kitchen safe.
Improves Cooking Performance
A dirty oven distributes heat unevenly. Grease and food residue on the walls and tray can block heat from reaching your food properly. This means longer cooking times and unevenly cooked meals. A clean oven heats more efficiently and gives you better results every time.
Extends the Life of Your Appliance
Just like any kitchen appliance, your toaster oven needs regular maintenance. Grease and grime can cause parts to wear out faster. Taking care of it with simple oven interior cleaning routines helps it last for years.
Gather Your Household Cleaning Supplies
Before you start, grab these items from around your house. You won’t need anything special or expensive. Everything here is gentle, natural, and safe to use around food surfaces.
- Baking soda – the MVP of natural cleaning
- White vinegar – cuts through grease and deodorizes
- Dish soap – for soaking and washing removable parts
- Lemon juice – a natural degreaser and fresh scent
- Warm water – the base of almost every cleaning solution
- Soft cloths or microfiber towels – for wiping without scratching
- A small bowl or container – for mixing cleaning paste
- A soft-bristled brush or old toothbrush – for scrubbing tight spots
- Rubber gloves – to keep your hands clean and protected
These items are all you need for a thorough clean toaster oven job. Skip the abrasive sponges and harsh chemical sprays. They can damage the interior coating and leave behind residues that aren’t safe for food preparation.
Step-by-Step Guide to Clean Out Toaster Oven
Now let’s get into the actual cleaning process. Follow these steps in order for the best results. Each step targets a specific part of the oven and uses simple household items you already have.
Step 1: Unplug and Cool Down
Safety first. Always unplug your toaster oven before cleaning. Wait until it’s completely cool to the touch. Cleaning a warm oven can cause burns or even damage sensitive parts. Give it at least 30 minutes to cool down after your last use.
Step 2: Remove the Crumb Tray
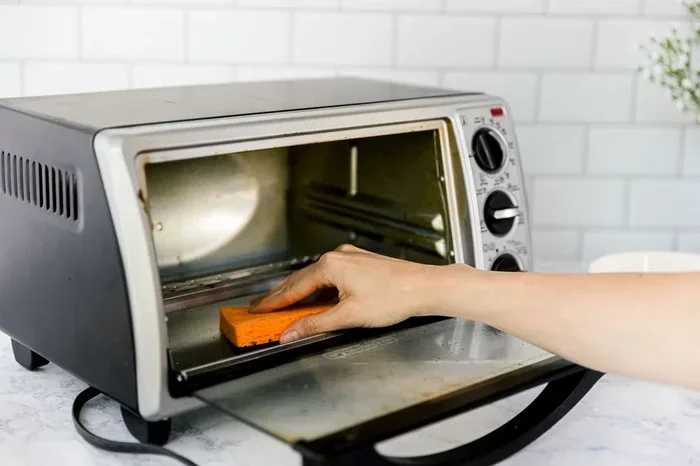
Most toaster ovens have a removable crumb tray at the bottom. Slide it out and empty the crumbs into the trash. This is the easiest part of the whole process and something you should do after every few uses. The crumb tray catches most of the food debris that falls during cooking.
If the tray has stuck-on grease, soak it in warm water with a few drops of dish soap for about 15 minutes. Use a soft cloth to wipe it clean. For stubborn spots, make a paste of baking soda and water, apply it to the stain, and let it sit for 10 minutes before scrubbing gently.
Step 3: Remove Removable Parts
Take out any racks, trays, or pans that can be removed. These parts usually soak up the most grease and food residue. Place them in a sink or basin filled with warm soapy water. Let them soak for 20 to 30 minutes. This loosens the baked-on grime and makes scrubbing much easier.
After soaking, use a soft sponge to wipe down each piece. For tough spots, sprinkle baking soda directly on the area and scrub with a damp cloth. Rinse everything thoroughly and dry with a clean towel before putting them back.
Step 4: Make a Baking Soda Paste for the Interior
This is the star of the show. Mix about three tablespoons of baking soda with a tablespoon of water to form a thick paste. The consistency should be like toothpaste. This paste is your natural grease remover for the oven interior.
Using a soft cloth or sponge, spread the paste evenly on the inside walls of the toaster oven. Avoid the heating elements directly. Let the paste sit for at least 20 minutes, or longer if there’s heavy buildup. The baking soda works to break down grease and food residue while it sits.
Step 5: Wipe Down the Interior
After the paste has had time to work, use a damp microfiber cloth to wipe away the baking soda and dissolved grime. You’ll be surprised at how much comes off. For stubborn areas, apply a little more paste and scrub gently with a soft-bristled brush or old toothbrush.
Next, mix equal parts white vinegar and warm water in a spray bottle. Spray this solution inside the oven. The vinegar will react with any remaining baking soda, creating a fizzy action that lifts away leftover residue. Wipe everything clean with a fresh damp cloth.
Step 6: Clean the Glass Door
The glass door on your toaster oven gets greasy and smudged over time. Make a paste of baking soda and a few drops of water. Apply it to the glass and let it sit for 10 minutes. Then wipe it clean with a damp cloth.
For extra shine, spray a little vinegar on the glass after wiping. Buff it dry with a clean microfiber towel. This method removes fingerprints, grease streaks, and food splatters without scratching the glass.
Step 7: Clean the Exterior
Don’t forget the outside of your oven! Wipe down the exterior surfaces with a damp cloth and a small amount of dish soap. Pay attention to the control panel, handle, and any buttons or dials. Use a slightly damp cloth for the control panel to avoid getting water inside.
For stainless steel exteriors, use a dedicated stainless steel cleaner or a small amount of olive oil on a soft cloth. This restores the shine and removes water spots. Always wipe in the direction of the grain on stainless steel surfaces.
Step 8: Reassemble and Plug In
Once everything is completely dry, put all the removable parts back in place. Make sure the crumb tray is securely seated. Plug the oven back in and you’re good to go. Your toaster oven cleaning is complete!
Quick Tips for Easier Cleaning
Making toaster oven maintenance part of your routine saves you from deep cleaning sessions later. Here are some quick tips to keep things simple:
- Line the bottom with aluminum foil: Place a sheet of foil under your food to catch drips. Just don’t cover the ventilation holes.
- Wipe after each use: A quick wipe with a damp cloth after cooking prevents buildup from hardening.
- Use oven-safe mats: Silicone mats catch crumbs and spills, making cleanup a breeze.
- Heat a bowl of water with lemon: This steam-cleans the interior and removes light grease naturally.
- Clean the oven when it’s slightly warm: Not hot, but warm enough that grease softens and wipes off easily.
- Keep a small brush near the oven: A quick brush after use removes loose crumbs before they become stuck-on residue.
Common Mistakes to Avoid When Cleaning a Toaster Oven
Even with the best intentions, people make mistakes that can damage their oven or reduce cleaning effectiveness. Here are the most common ones to watch out for.
Using Abrasive Cleaners or Scrubbers
Steel wool, rough scrub pads, and abrasive cleaners might seem like they’d work faster. But they scratch the interior coating of your oven. These scratches trap grease and food particles, making future cleaning harder. Stick with soft cloths, sponges, and gentle solutions.
Using Too Much Water
While you need moisture to clean, too much water can drip into the heating elements or electrical components. Always wring out your cloth well. Never spray liquid directly into the oven. Use a damp cloth or a spray bottle applied lightly to surfaces, not inside the oven cavity.
Skipping the Crumb Tray
The crumb tray is the most neglected part of any toaster oven. When it fills up, crumbs can fall onto the heating elements and burn. This creates smoke, odors, and even fire risks. Make removing and cleaning the crumb tray a regular habit.
Ignoring the Exterior
A clean interior doesn’t matter if the outside looks terrible. Grease splatters on the door and handle are common and unattractive. Wipe the exterior regularly to keep your oven looking new and to prevent sticky buildup that’s harder to remove later.
Waiting Too Long Between Cleanings
The longer you wait, the harder the toaster oven cleaning becomes. Heavy grease buildup requires more effort and stronger solutions. A quick cleaning every week or two keeps things manageable and prevents deep-set stains.
Expert Insights on Maintaining a Clean Toaster Oven
Professional chefs and appliance experts agree that regular, gentle cleaning is far more effective than occasional deep scrubbing. Here’s what the experts have to say about keeping your oven in top shape.
Consistency beats intensity. A quick wipe-down after each use takes less than two minutes. Over time, this habit prevents the need for harsh cleaning methods. Think of it like brushing your teeth — small, regular efforts prevent big problems.
Natural cleaners work surprisingly well. Baking soda, vinegar, and lemon juice have been used as cleaning agents for decades. They’re effective, affordable, and safe. Commercial oven cleaners often contain harsh chemicals that leave residues. Natural solutions give you peace of mind, especially in a kitchen appliance that touches your food.
Know when to replace parts. If your crumb tray is severely rusted or your racks are warped beyond use, replacement parts are inexpensive and easy to find. Keeping your oven’s components in good shape contributes to overall performance and cleanliness.
How Often Should You Deep Clean Your Toaster Oven?
A light wipe-down after every few uses keeps your oven in good shape. But a full deep clean should happen every four to six weeks, depending on how often you use it. If you use your oven daily, aim for every three to four weeks. If it’s used occasionally, once a month is usually sufficient.
Watch for signs that it’s time for a deeper clean. If you notice smoke during cooking, lingering odors even after use, visible grease buildup on the walls, or food tasting off, it’s time to give your oven a thorough cleaning session.
Benefits of Using Household Items Instead of Commercial Cleaners
You might wonder why bother with baking soda and vinegar when commercial oven cleaners are available at the store. There are several great reasons to stick with household items.
- They’re safer for food surfaces: No chemical residues left behind that could transfer to your food.
- They’re cost-effective: Baking soda and vinegar cost pennies compared to specialty cleaners.
- They’re environmentally friendly: Natural ingredients break down safely and don’t release harsh fumes.
- They’re multi-purpose: These same items clean kitchen counters, sinks, and other surfaces too.
- They’re gentle but effective: When used correctly, they handle most grease and grime without scratching.
Making the switch to natural oven interior cleaning methods is one of the easiest changes you can make in your kitchen routine. Your oven, your health, and your wallet will all thank you.
Conclusion
Learning how to clean out toaster oven with simple household items is one of the most useful kitchen skills you can develop. With just baking soda, vinegar, dish soap, and a little elbow grease, you can keep your oven looking and working like new. Regular maintenance makes the process quick and painless, while deep cleaning sessions every few weeks handle any buildup that sneaks in.
Remember to unplug your oven before cleaning, work gently to avoid damaging surfaces, and make wiping down a regular habit. These small efforts pay off big time in performance, safety, and the lifespan of your appliance. Now that you know the tricks, there’s no excuse not to give your toaster oven the care it deserves. Grab those household items and get started today — your clean, fresh-smelling oven is just one session away!
Frequently Asked Questions
Can I use bleach to clean my toaster oven?
No, you should avoid using bleach inside a toaster oven. Bleach can damage the interior coating and leave harmful chemical residues that aren’t safe around food. Stick to natural cleaners like baking soda, vinegar, and dish soap for safe and effective results.
How do I remove burnt-on food from my toaster oven?
Make a thick paste of baking soda and water and apply it to the burnt spots. Let it sit for at least 30 minutes, then scrub gently with a soft cloth or toothbrush. For tough spots, spray vinegar on the paste to create a fizzing reaction that helps lift the residue.
Is it safe to put the toaster oven tray in the dishwasher?
Yes, most toaster oven trays and racks are dishwasher safe. Check your owner’s manual to confirm. If you prefer hand washing, warm soapy water with a soft sponge works just as well and helps extend the life of the parts.
What’s the best way to remove grease from the toaster oven door?
Mix baking soda with a little water to form a paste, apply it to the greasy areas on the door, and let it sit for 10 minutes. Wipe clean with a damp cloth. For the glass, add a splash of vinegar to the damp cloth for extra cutting power on stubborn grease streaks.
How can I keep my toaster oven from smelling bad?
Regular crumb tray cleaning is the number one way to prevent odors. You can also heat a small bowl of water with lemon juice inside the oven for 10 minutes. The steam helps loosen residue and the lemon leaves a fresh, clean scent behind.
Can I clean my toaster oven while it’s still warm?
It’s best to wait until the oven is completely cool before cleaning. However, if you’re doing a quick wipe-down, cleaning it while it’s slightly warm (not hot) can help soften grease and make it easier to wipe off. Just be careful not to burn yourself.